Hey all! Coming back at ya with part 2! Last time we upgraded Octoprint to python 3 and made our printer run a lot quieter. This time around, its all about precision. Not just your naked eye, close enough, horse shoe hand grenade precision. I’m talking electron microscope, NASA caliper, laser guided, down to the quark precision. True Level.

Two purchased upgrades got me there, a z-axis motor upgrade kit, and an Auto bed leveler. Lets start with the Z-axis Kit!
We Must Level Z-Print!
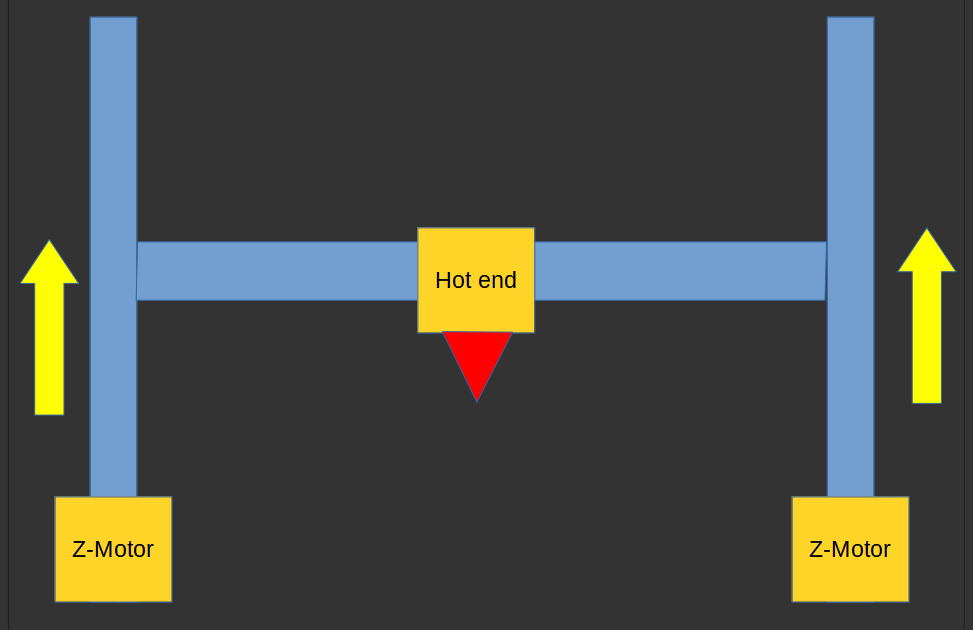
So what the hell is a Z-axis kit? Well, on an Ender 3, there is only one Z-axis motor to move the print head up and down. This motor is only on one side of the frame. For most printing this is fine, but for really detailed prints, it causes a slight slant. When the Z-axis motor moves up or down, it tends to pull the horizontal bar that the hot end runs across. The effect is the bar ends up higher on one side when moving up, and lower when moving down.
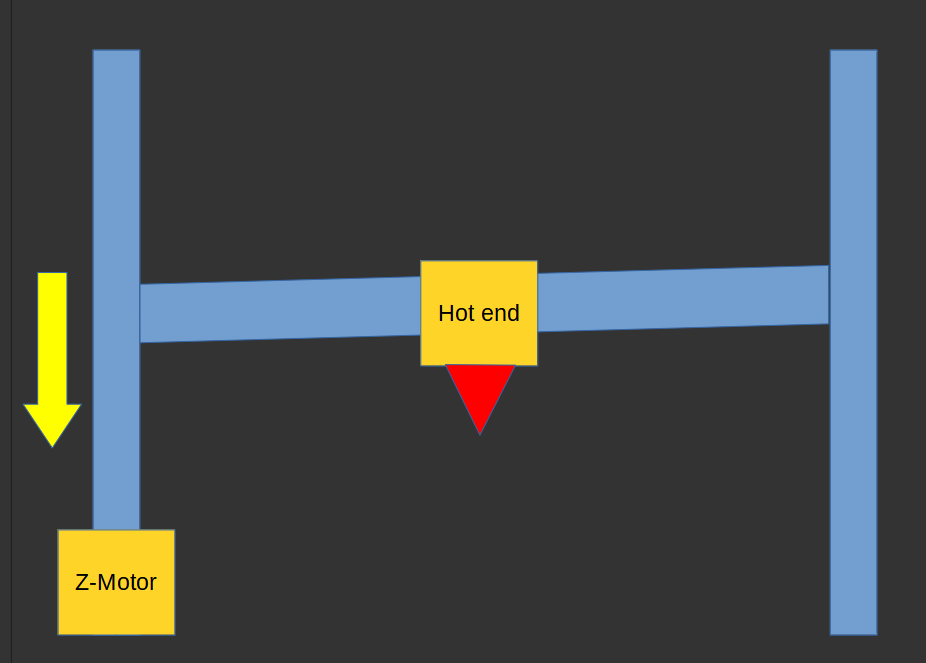
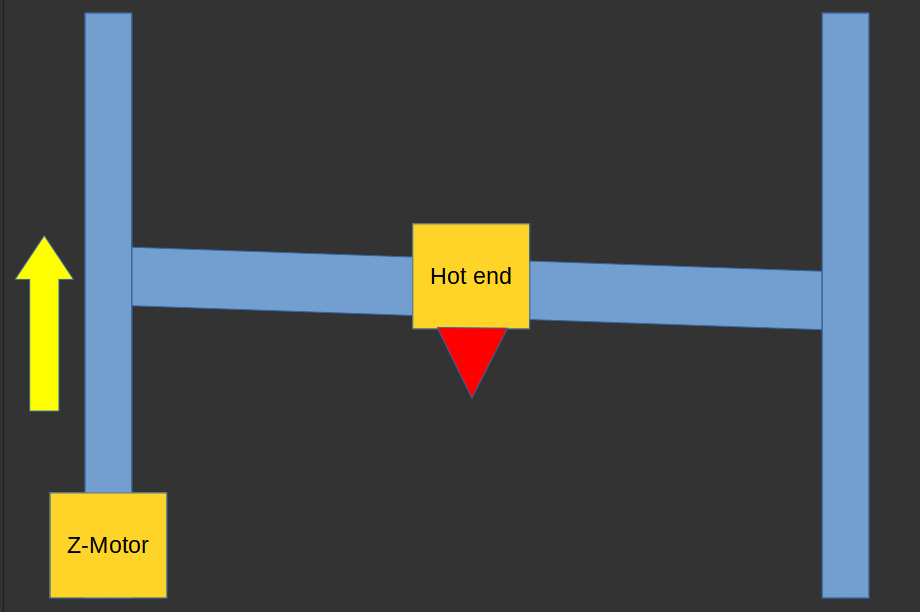
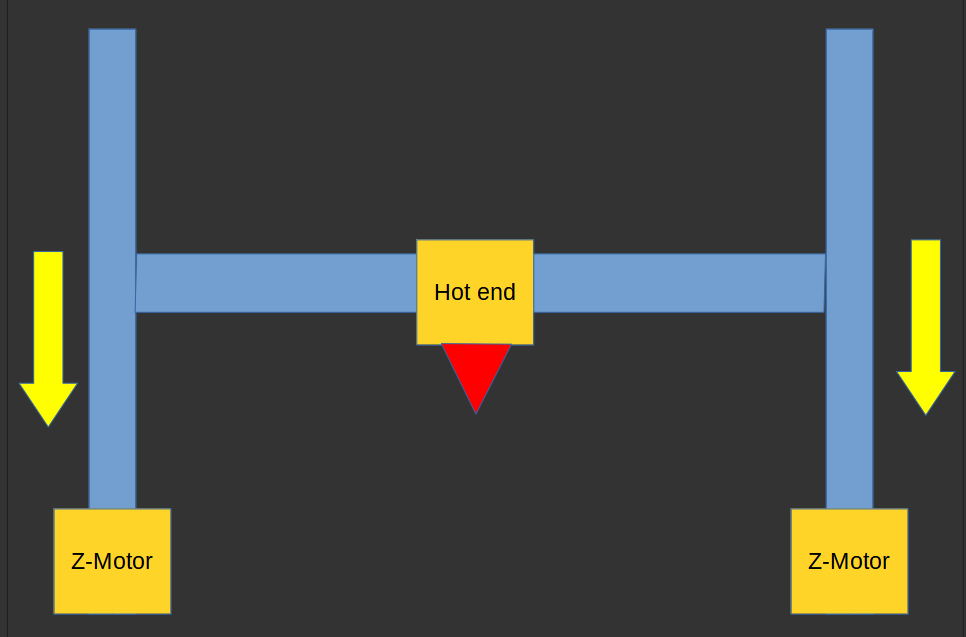
To solve this, we install a secondary Z-axis motor and threaded rod to balance the vertical movement. The idea is the motors work in unison, zeroing out any slanting that would occur.
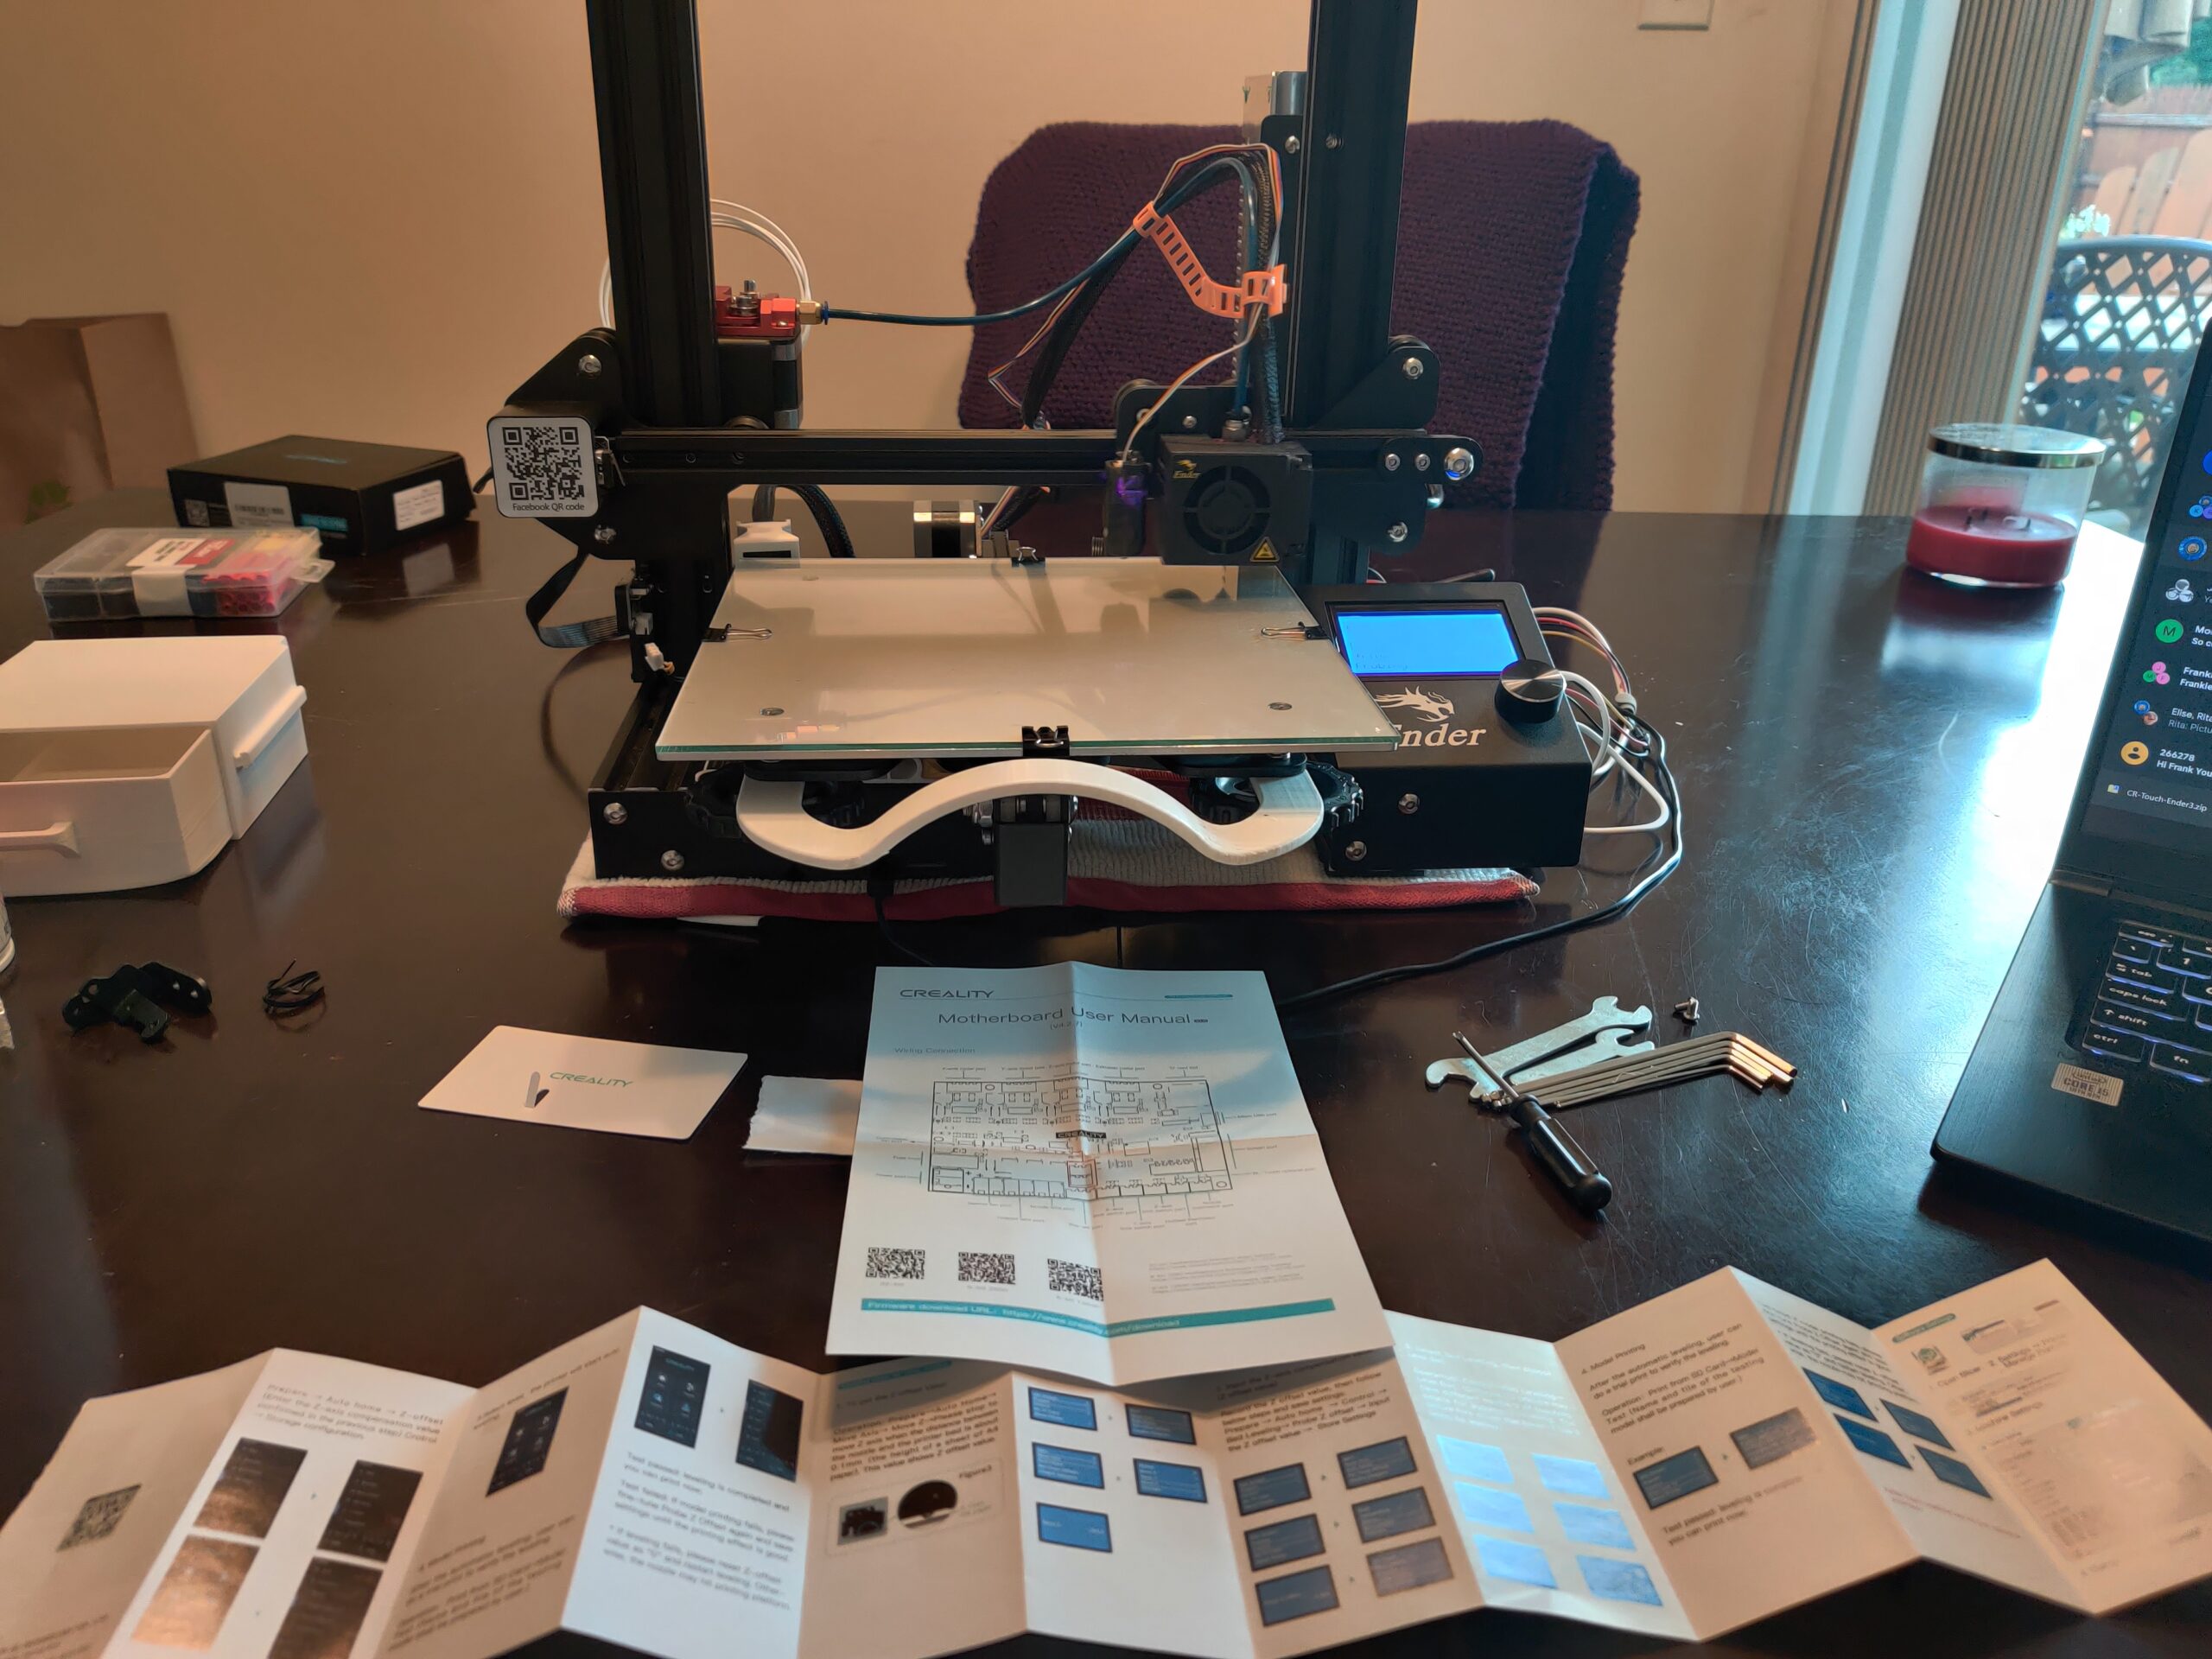
Doing Zeeeeeeee Level Install
The install is fairly straight forward. It involves basically the same level of tear down as it did to install the new main board. The kit includes a secondary Z-axis motor, mounting bracket for the motor and rollers, a mounting plate for the power supply, and a threaded rod. The wiring changes a bit too, since power is run between both motors now.
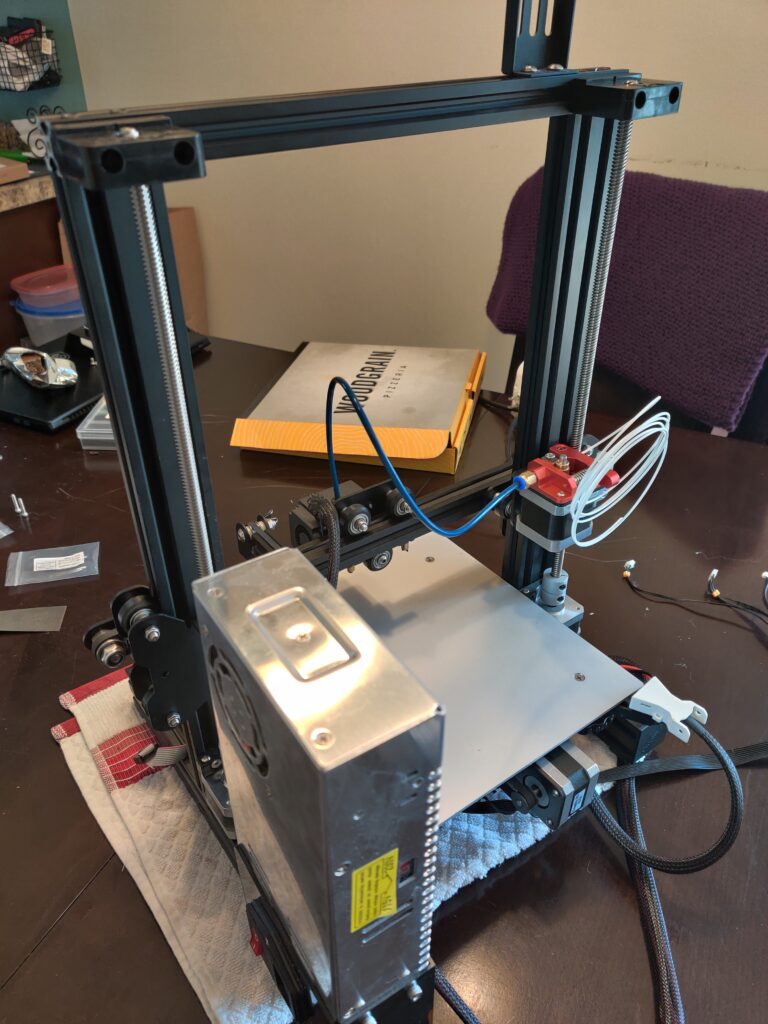

Not to mention with the PSU changing locations on the frame, all of the Pi, volt regulator and relay wiring needs to also be rerouted. After its all installed, before attaching the motor bracket to the frame, its important to be level. Otherwise, this the threaded rods out of sync, you will always have a slant. The kit comes with a little bubble level, which is a nice perk.
And with that, we no longer have slanted prints. But is this true level? Is this really as good as it gets? Far from it. We’re only just getting started. Next, we need to install the Auto Bed Leveler!
Taking Leveling to Whole New Level
The Auto Bed Leveler, aka the Creality CR Touch, is a complete game changer. Its a little probe that attaches to the hot end and probes around the bed before a print. It then figures out how to auto adjust the Z motors during the print to make the job completely level. So as the hot end moves across the bed, the z motors are ever so slightly adjusting themselves to keep the print perfectly level.

First, lets get the probe installed. Like I mentioned, its attached to the hot end, via a bracket on the left side. The wiring follows the amp wires back to the control board under the printer. This time, I didn’t have to completely dismantle the frame.

Lastly, the Z stop switch need to be removed. This is because the probe will now act as the stopper, telling the printer where Z 0 is. That’s it for hardware, software is a tad more tricky…
Try not to brick your printer! 🙂
Yeah, flashing firmware… yay… Like walking through a minefield and praying that the instructions you are following are not about to make you do something irreversible. What got me through it is read everything like 6 times, then say fuck it and pick one.

No but seriously, here are the steps that got me through it.
- Go to the CR Touch on Creality’s Website
- Scroll down till you see the description, then go to the downloads tab
- Follow the link for the CR Touch firmware download, it should open Google drive
- Find CR Touch, then your printer, then download the zip files (for me I used version 4.2.7)
- You’ll also want to download the CR Touch manuel PDF
- After extracting, load the bin file onto a micro SD card to feed into the printer
- Power off the printer, insert the SD Card and power the printer back on
- Let the firmware update process
- If it worked, pat yourself on the back and have a celebratory drink 🙂
- If not, pray that the printer boots and lets you attempt the firmware again 🙁

Ok, if you are still reading and haven’t punched a hole in your laptop from my bad advice, congratulations! Lets continue!
Now for the fun part 🙂
With new firmware installed, we have new options in the printers LCD screen. Two things are going to be go-to, Auto Bed Level, and Z-Offset. Auto bed level is self explanatory. It starts the ABL sequence I mentioned earlier where the hot end probes the bed at 9 different spots and records its height. The Z-offset, is going to be much more important.
The Z-offset is how far away the nozzle of the hot end is away from the bed. The probe doesn’t go all the way down where the nozzle is making contact. It goes until the probe makes contact, which is much lower than the nozzle. If you start a print job with Z-Offset at 0, your filament probably isn’t even going to touch the bed.

So, you can raise the bed till your prints come out correct (lots of work), which is a lot of work. Or! Auto home the probe, get the current z value, go into the printer and step it down 0.01mm, do the post-it trick till the nozzle is snagging it a little, and mark what z value you are at.

In my case, I started at 10.3mm, ended up at -0.9mm to get things to print perfect. With that set, printing out a few diagnostic tests, I can say that it worked handsomely. Not only that, between prints I would purposely change the springs on the bed and make it worse. Re-running ABL, I wanted to see if it would compensate. It did, to an extent… but it can’t save you from going full retard 😛
Auto Bed Level + Octoprint = SOMEONE STOP THAT MAN

Yes, this is where things get crazy! In Octoprint there are a few must have plugins for ABL.
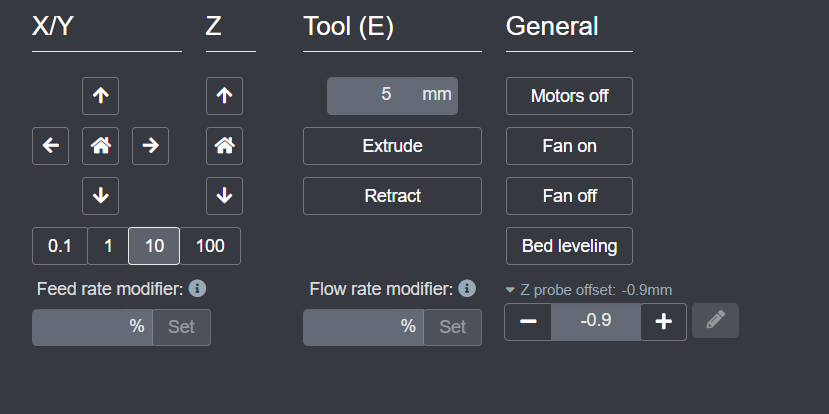
The Z Probe Offset plugin, adds the Z probe value in the control section in Octoprint. It also allows you to set the Z-offset in Octoprint and send it to the printer. I learned that every time my relay turns the printer off, my Z-offset goes back to 0. The amount of times I’ve started a print just to see if fail because of a 0 offset…
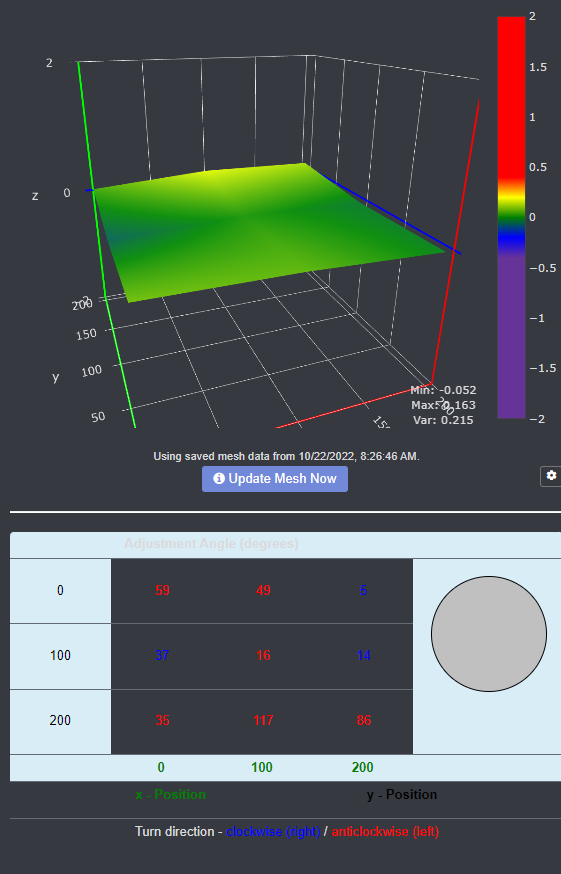
The Bed Level Visualizer. This one is really cool! It does the bed level functionality, heating up the bed and running the probe through test points. The key difference here is instead of just showing you the mesh values of how bad the bed is, it shows you a HEAT MAP! An actual, multi-colored heatmap of the bed and where adjustments need to be made. This is by far the most useful plugin for ABL.
The Results? Was the Upgrade Worth it?!
Yes, yes and yes! I’ve gone back and printed some things that I did before the upgrade and can genuinely see results. The Cell phone holder for example, had strange warping at certain heights and line by line you can see it was struggling to keep the filament straight. Now, holding the print to the light and seeing the layering, its damn near perfect.
However, I did learn that ABL has a rough learning curve. For example, I missed the part in the CR Touch instructions where you need to modify your prints start GCODE. In Cura, I needed to add code G29 after G28 in the start code. This tells the printer to run ABL after auto homing so it can have a fresh mesh to print on. But, in doing some research as I’m writing this, I’m learning from some printer veterans out there that you don’t have to ABL every print.

So, I still have a lot to learn about ABL and how to make it work most effectively and efficiently for me. If the consequence is that I wait a little longer for my prints, then I can live with that, for now….
Well that’s all I got for this round. Part 3 will go over the changes I have to make with my existing accessories co-existing with my new upgrades. Lots of things moved so some adjustments are going to have to be made.
Thanks for coming by, until next time!