Finally, another post! I basically skipped the month of November and almost December. Thanksgiving food put me in a virtual coma (see what I did there ¬‿¬ )

Anyway, while I didn’t post anything, there were lots of fun things going on in the last couple of months. One of the big projects I wrapped up was setting up a new Virtual environment for this site and a few other servers I popped up. Lets Recap!
The Virtual Server
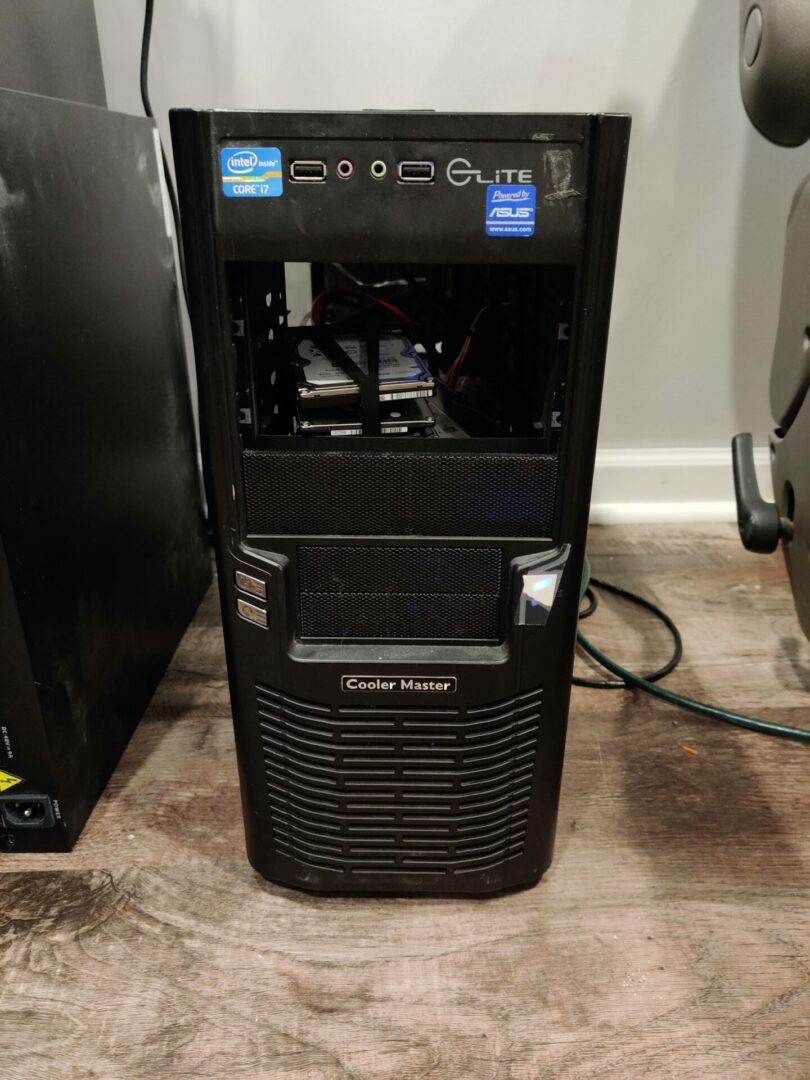
This site originally was running on a very old laptop I inherited from my wife’s friend. We’re talking Celeron, 4GB 32bit windows XP here. Obviously, that’s more than enough for Ubuntu server to run giving this laptop its second wind. But it wasn’t enough for me to host more subsites in Virtualmin or convert the laptop into a hypervisor to run VMs.
The box that I am running with now is a completely different animal. The only thing that I will ever horde is tech. You never know when a cable, RAM stick or video card will come in handy a few years down the line. In this case, I had enough spare parts lying around to make a full fledged server. Lets go over the specs!
- 8 Core AMD FX-8150
- 16 GB DDR3 RAM
- ASUS M5A97 EVO R2.0
- 3.75 TB HDD (multiple 500GB and 1TB disks)
- Corsair H60 Liquid cooling radiator
- NVIDIA GTX 550 Ti
- Diablotek 600W power supply
The “fun” part was setting up all of those HDD’s to talk to each other and act as one big hard drive. Proxmox kind of made that easy but I really needed to dive into LVM.
Why knowing LVM is a Good Idea!
Logical Volume Management, tricking a computer into thinking there is one big hard drive when its really several little hard drives. It also a really robust way to slice and dice your physicals drives into whatever you want! There are three layers to the LVM, lets walk through it!
The Physical Layer

Just like it says, this is the physical hard drives. I have a random grab bag of drives. Mixing 1TB drives with 500GB, full size desktop and laptop sizes. I only have 6 SATA ports on the board and I had to use a few Molex adapters on the power supply to have enough power for all of them. Next, I format all the disks and set them up with GParted. GParted is an awesome graphical tool that lets you skip the pain of knowing all of the disk commands to setup partitions and physical volumes. With my volumes and partitions in place, we can move onto setting up volume groups!
The Volume Group Layer

The volume group layer is where LVM lumps all your physical disks into one big drive. So that’s it we’re done? Not quite. Setting up the volumes doesn’t extend the logical volume or the file system. This is just so you can logically allocate space to the physical disks the way you want. In my case, I just want one big volume across all disks. But if I wanted, I could setup 2 volumes across 6 disks, 3 disks a pop. It all depends on how you want to slice it up!
The Logical Layer

Now we get into the meat and potatoes! The logical layer is the last layer of LVM. This is the layer where you can break up your volume groups into smaller pieces. Linux really loves to give its users lots of options 🙂 I couldn’t really figure out how to do Logical Volume management with GParted so I had to resort to command lines tools for this part.
However! I did learn after getting a few VMs setup with Virtualmin, that when resizing the VM disk, booting into GParted and resizing the volume, that going back into Vmin, there is a tool for LVM management. It goes as far as extending the logical volume as well as expanding the file system. That makes things very easy since its all graphical! (Hey I come from Windows, leave me alone… I like my GUI’s…)
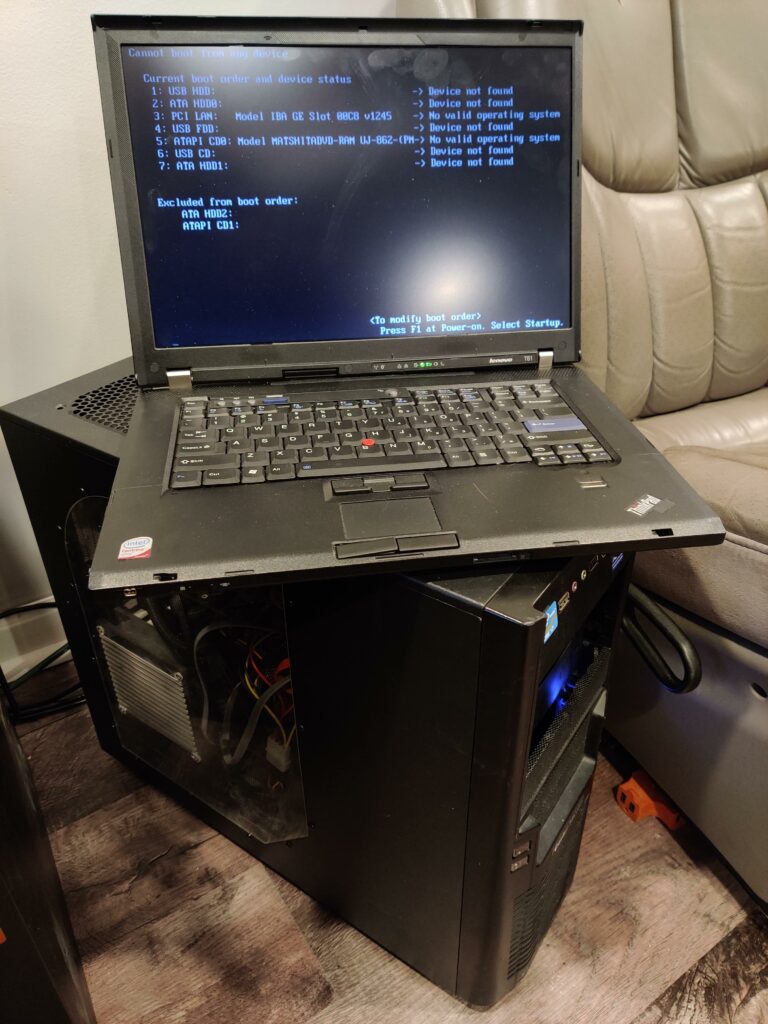
A Physical Problem with Virtual Drives
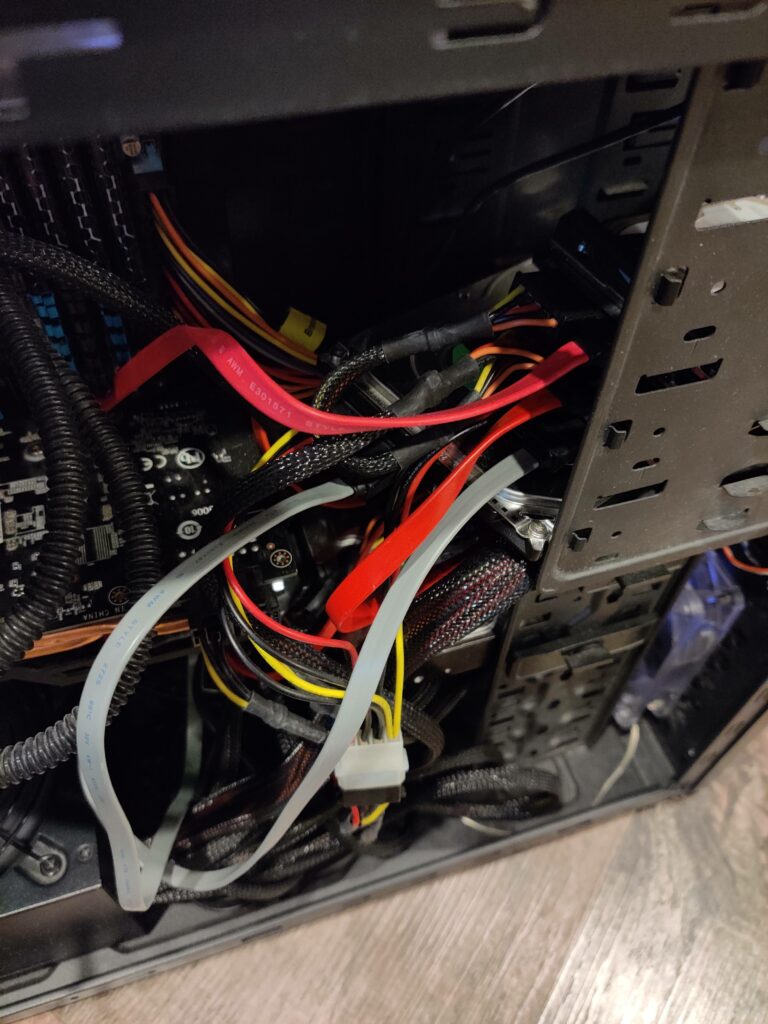
Now with the drives in place and the LVM done, I can start firing up VMs in Proxmox and start virtualizing. One thing still wasn’t sitting right, the drives were not physically sitting right. The Chassis that I have holds 3 slots for full size drives, and two slots for laptop size drives. I had three of each and I didn’t even have enough screws to mount them all correctly. So a good chunk of my drives were just sitting lose inside the chassis. That is just going to drive me a little nuts. Looking online for plastic mounts for my case, I realized that I own a god damn 3D printer, why don’t I just make my own mounts!
Design!
The design was very simple. Like building a small shelving unit, it would have slots in the face that hold the small drives and stack them up by 3. The drives do not need to be completely covered, so it would be more like a wire frame. There was one little caveat with printing this way.
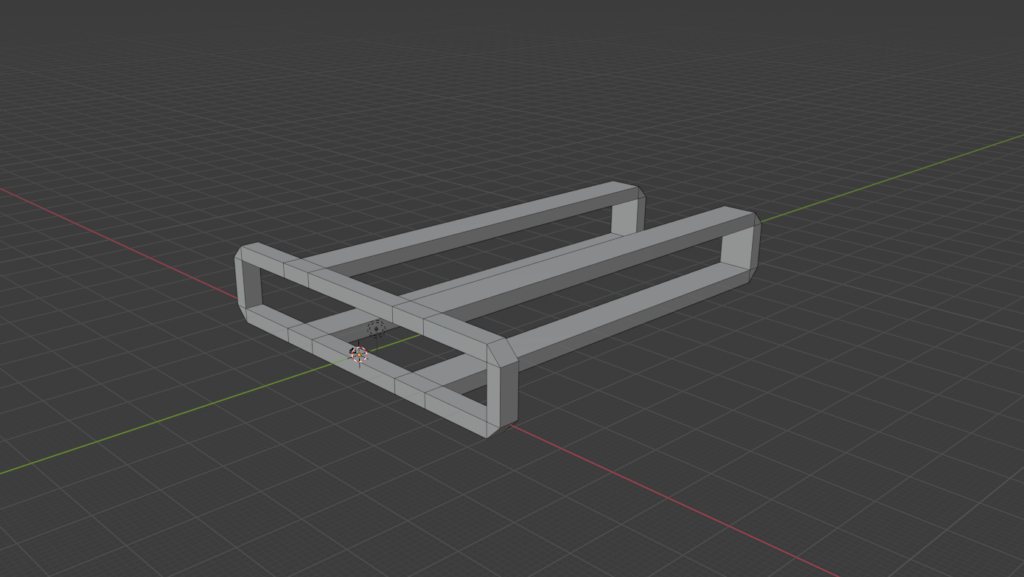
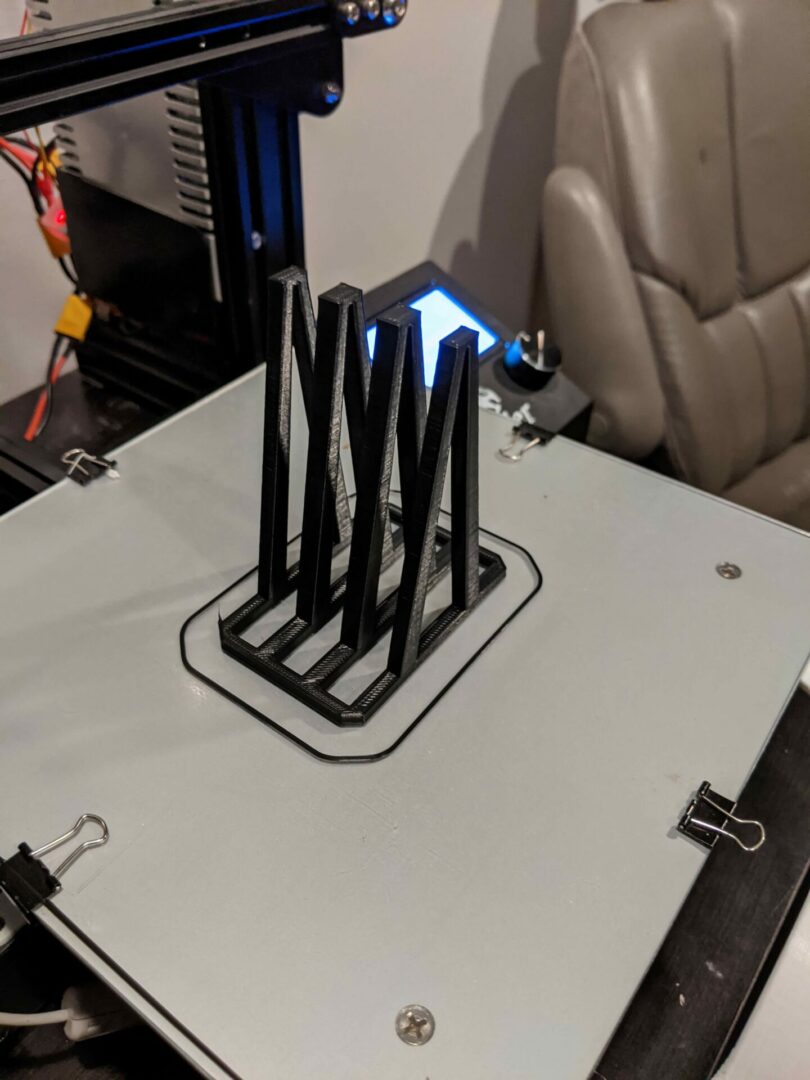
The frame would have a ton of overhangs, meaning that the print would require a shit ton of supports. Supports are awesome when they work, but if they are over used then they can ruin a print. I had to think of a different way to get a stacked frame but print it in a way to minimize support. To work around this, I changed the back end of the frame into a triangle.
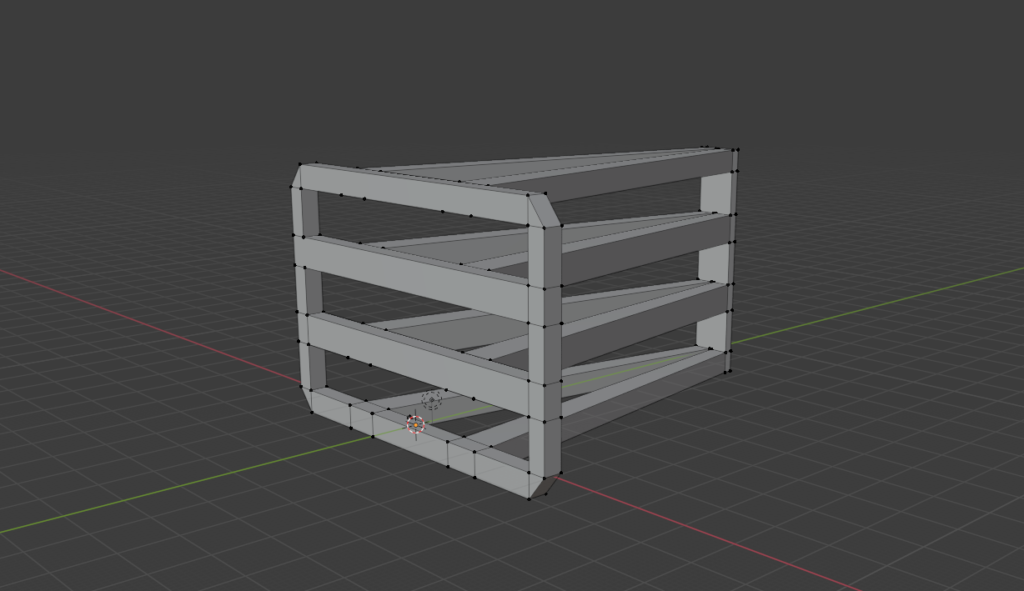
When it prints, I rotate it on its face, making it look like a teepee. The only supports needed now are for the spine in the back to hold the drives in place.
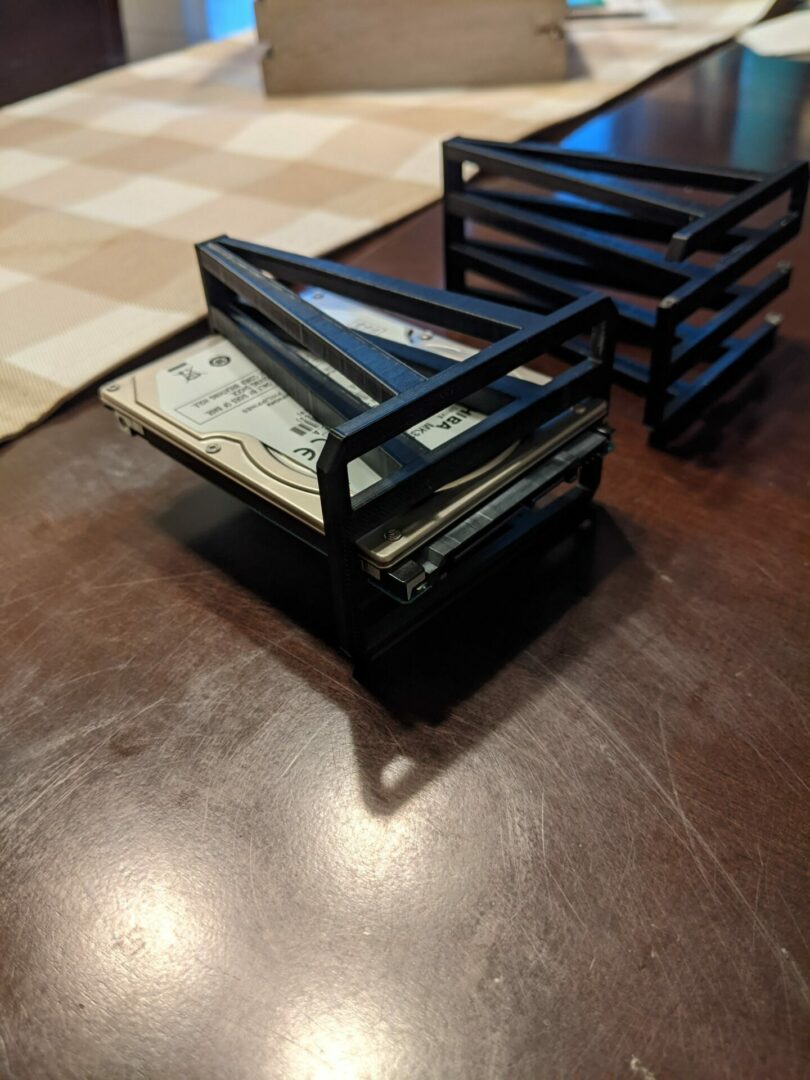
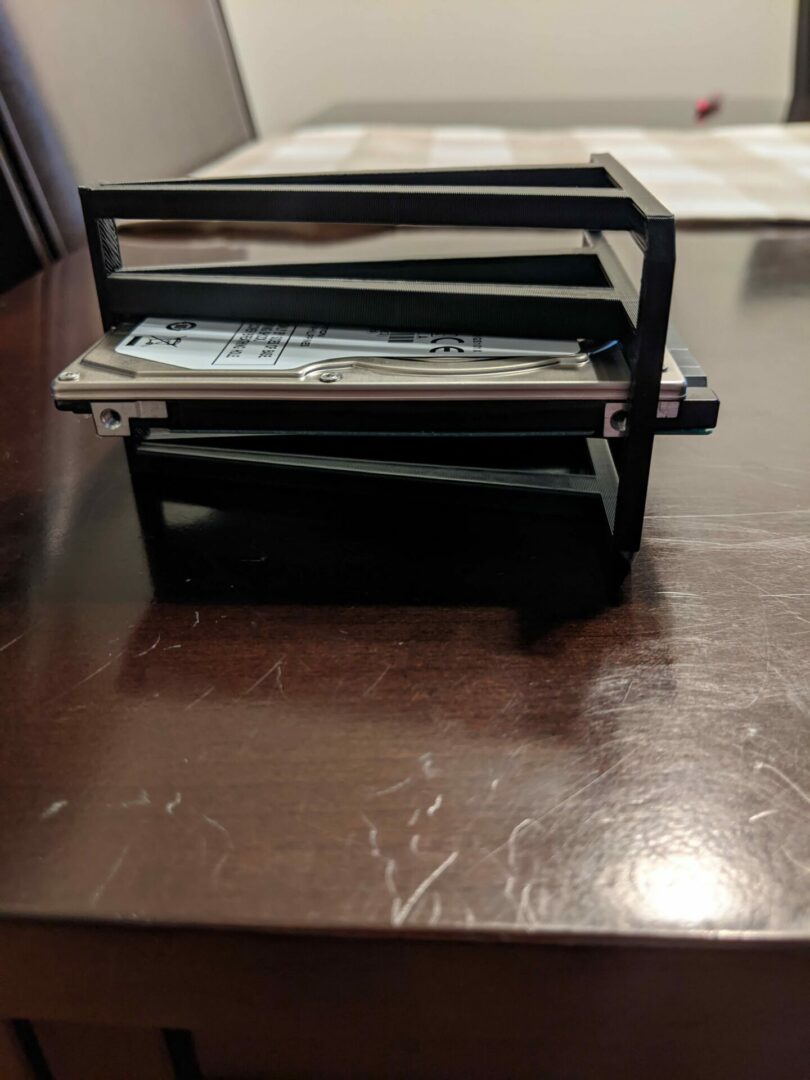
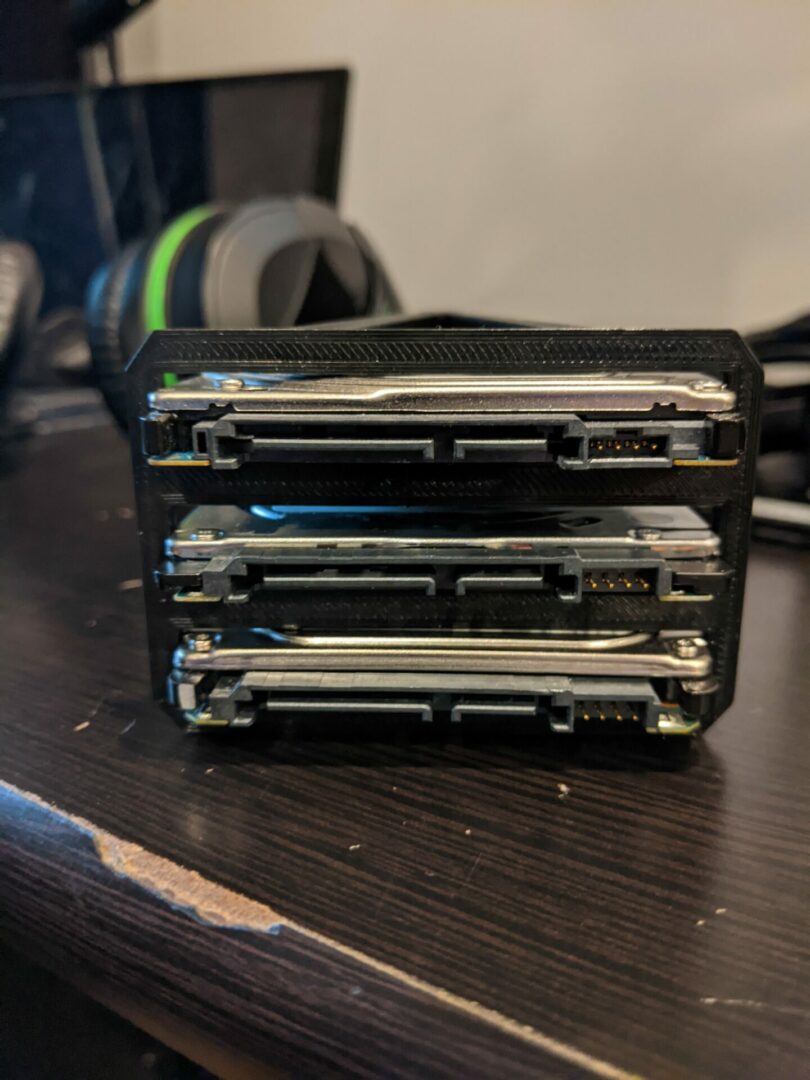
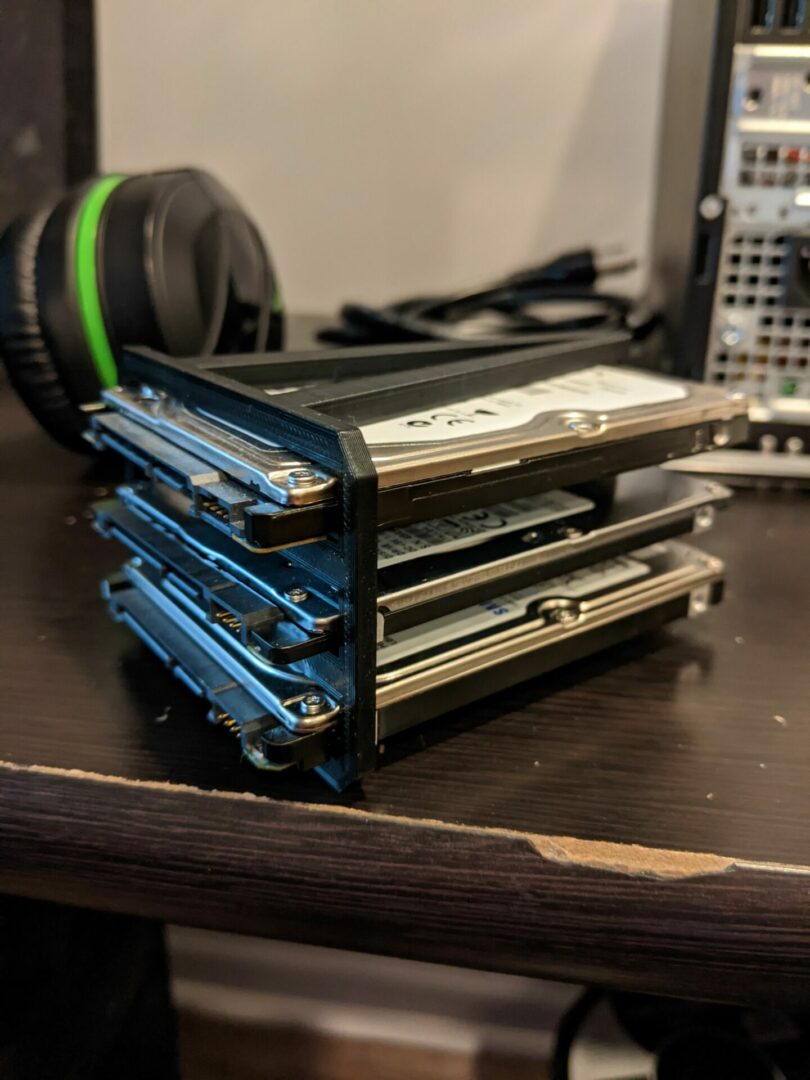

And with that, Voila! We have a drive enclosure! Making things just a tad more organized inside the chassis.
The Virtual End Result

Now with the virtual environment ready, the drives properly in place and LVM set, the server is ready for production use!
First obvious thing that I did was move over this website over to it, setup backups, automatic updates, SSL renewals, you know the works 🙂 My future prospects take me to a new project using OpenHAB, setting up a plex server, and what ever little fun open source projects I find along the way. To save me some time, in Proxmox you can setup templates to bootstrap your VM setup. Have Ubuntu ready to go, Vmin out of the box, or Kali preconfigured!
Disclaimer! Much of above is me talking out of my ass and just brain droppings of the things I’ve learned along the way. They probably are not the correct or the safest way to do things, especially with LVM. Before you do anything with LVMs, make sure you do tons of homework and have a safe backup if you are working with important data. Other than that, remember to have fun!
Well, that is enough word vomit for today, thanks for swinging by! Keep it virtual out there!