
Well guys, the time has come. Its time to move on, move on from mediocrity, move on from stagnation. Its time to step into the big leagues and swing for greatness. A while back, I mentioned that I virtualized this whole site and threw it on an ancient gaming box. Now I’ve managed to get my hands on some serious hardware. Not the liquid cooling kind but close. We’re talking servers, full blown, rack and stack servers. The problem I quickly ran into is the word “rack”, one I did not have. Quick fix right? Just buy one online. Sure no problem, except a cab is oh $300, and I ain’t paying that much for just chunks of metal with holes in it. So, when you don’t buy it, you build it.
Racking up a Plan
My go to material for this is going to be wood, specifically 2×4’s. For me wood is a better option than metal since my setup wont require flexibility with how things get racked. Speaking of which, I first needed to get a sense of size and how these servers were going to stack up. Oh right! I never went over what boxes I got a hold of! 🙂

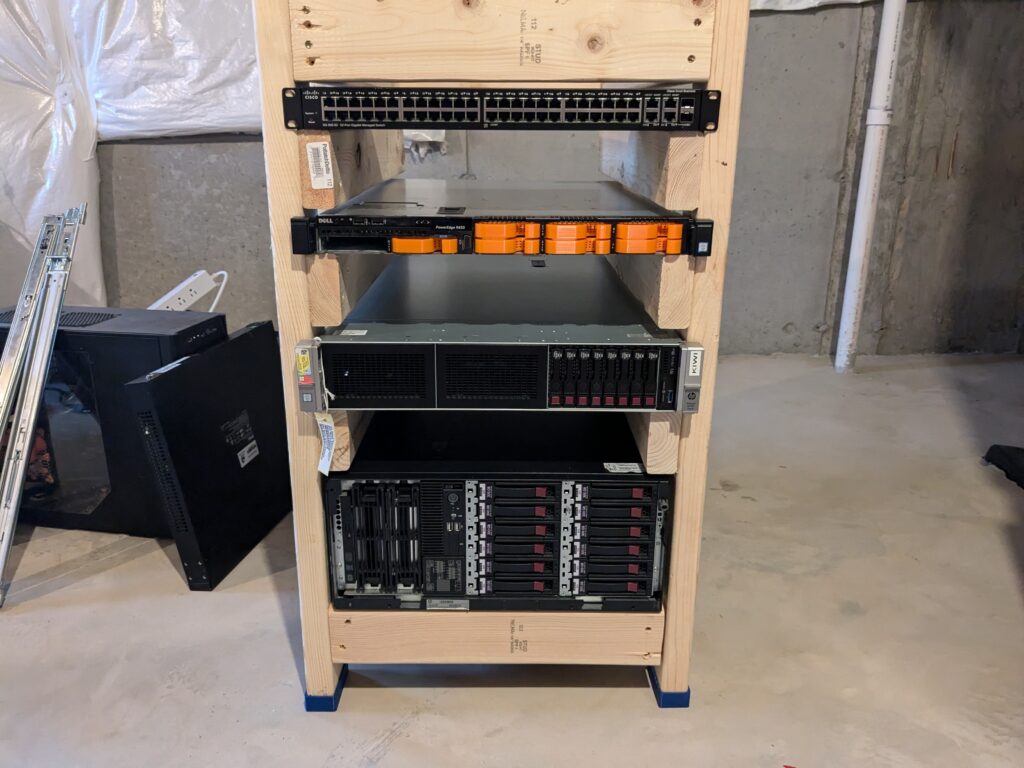
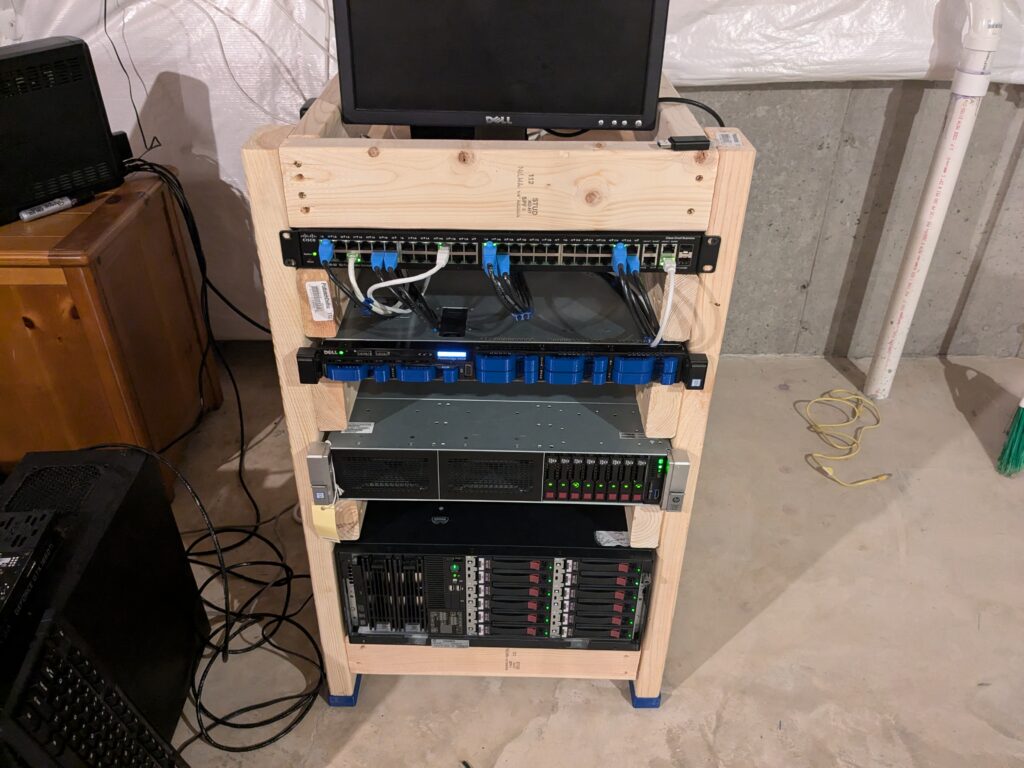
Lets quickly talk about the hardware and what we’re dealing with here. The first server is a Dell Power Edge R640, packing 40 Xenon CPU cores, 64GB of ECC RAM, and ZFS RAID SSD drives. The second server is an HP DL360 Gen 6, a lesser power house with only 16 CPU cores, 32GB of RAM and 8 drive bays, RAID 5 of course. Finally, the largest but weakest box, HP DL370 Gen 6, 16 cores and 23GB, 12 RAID Drive bays with controller. The final piece is networking, where we have a Cisco SG300, the big 52 port boy. Now that we get specs out of the way lets talk U’s.
What’s the matter with U?!
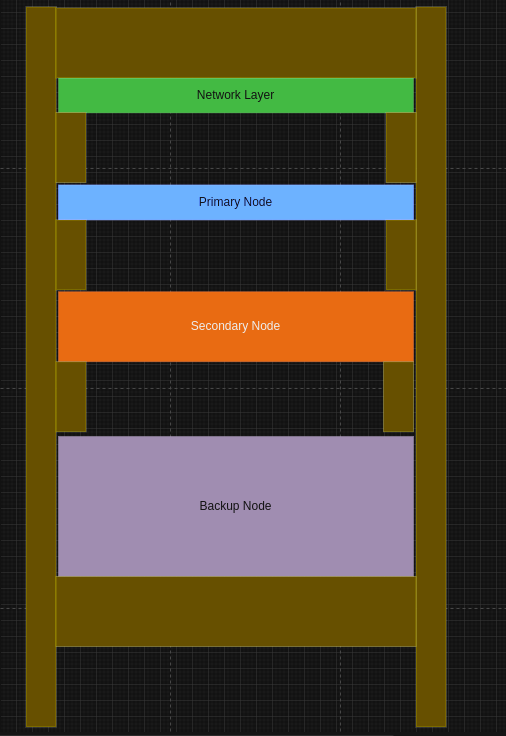
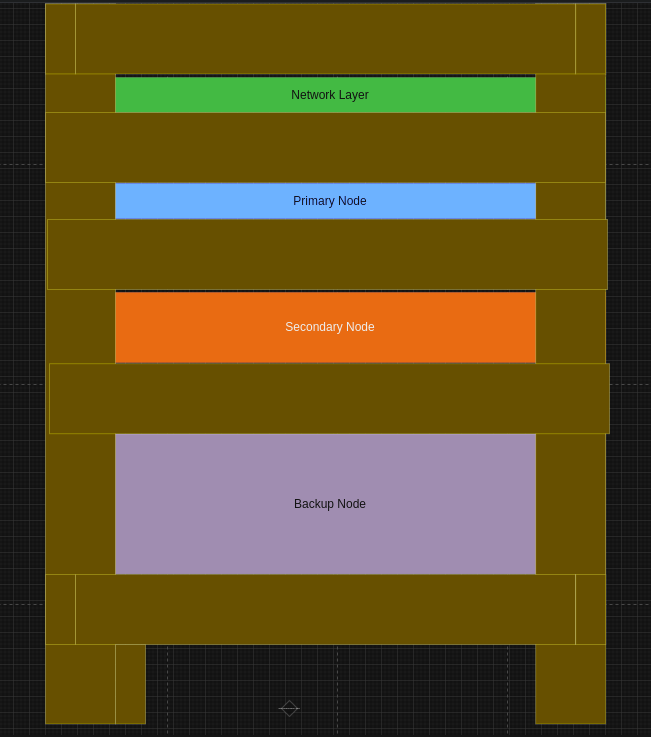
In the server world U’s are everything. They are a standard unit of measure (1.75″) to let admins know how much rackspace a server is going to eat up. A typical server rack is about 42U’s. Knowing that, I’m able to measure each server and get a U conversion out of it. First server and the switch are 1U because I don’t think you make them smaller than that. The second server was about double the thickness as the first, so 2U. The last of the servers was 4x the size, so 4U. So with just the hardware, I’m looking at 8U’s. But, if I’m including the 2×4’s which really are 1.5″, almost the same size as 1U, then I’m looking at 13U. That is about 1/3 of a full size rack. With all the information gathered ahead of time, I was able to throw together a diagram.
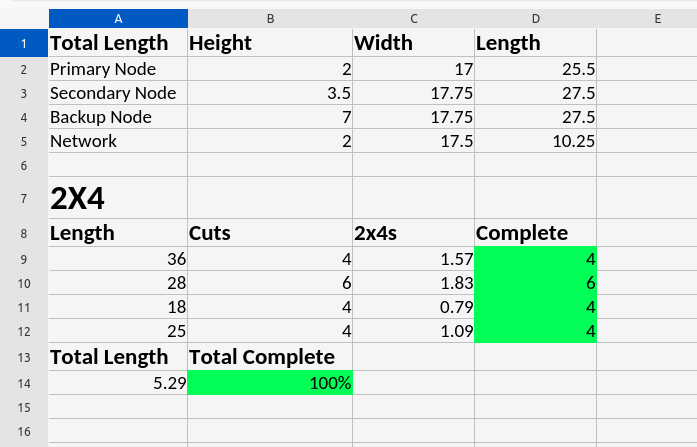
All that’s left at this point is to buy some 2×4’s, make the cuts and pray that I didn’t measure wrong. Oh and in case you didn’t I was nerdy enough, I also made a breakdown spreadsheet to help me figure out how many 2×4’s to buy and how many cuts I was going to make.
Cut the Rack and Que the Music

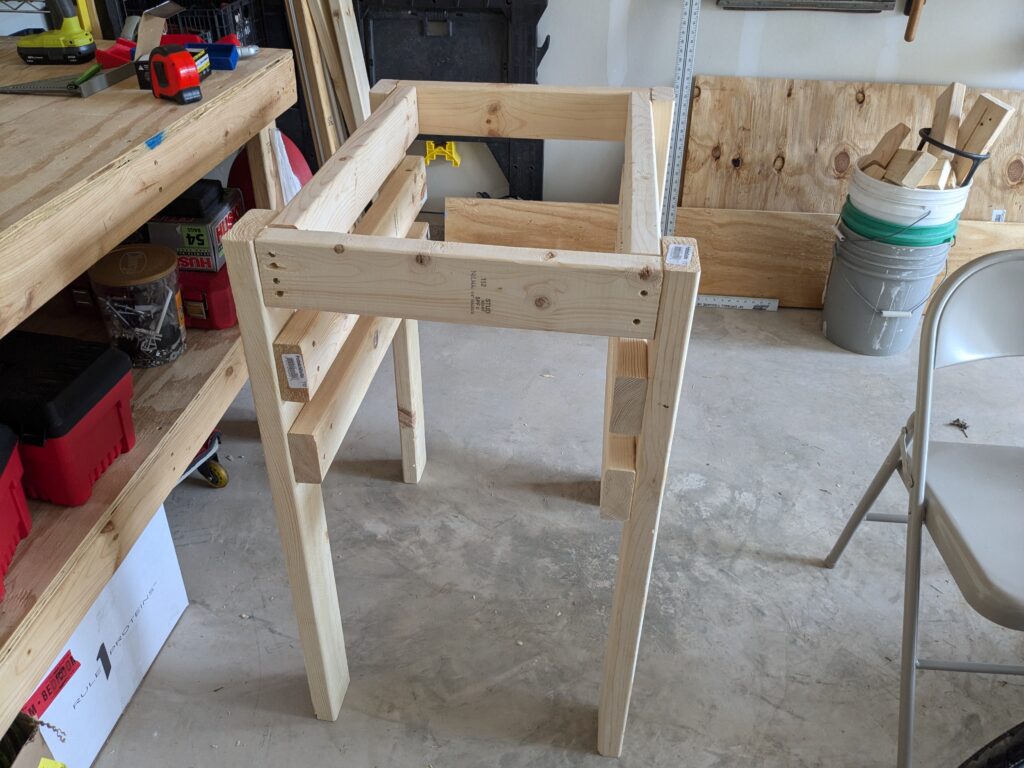
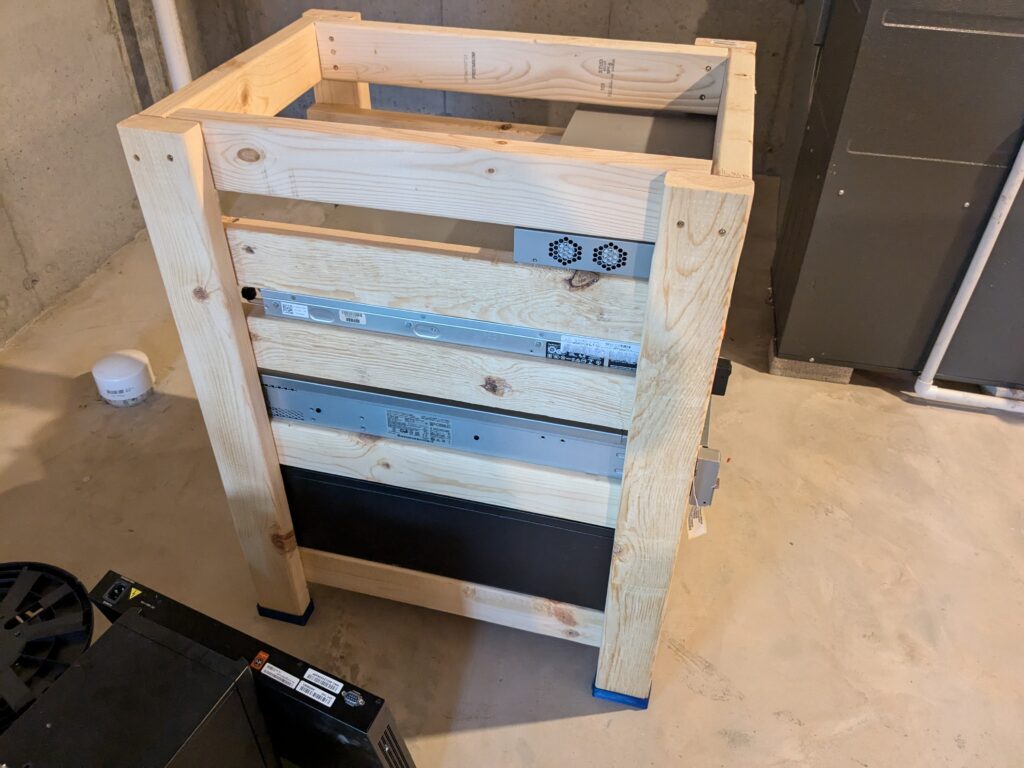
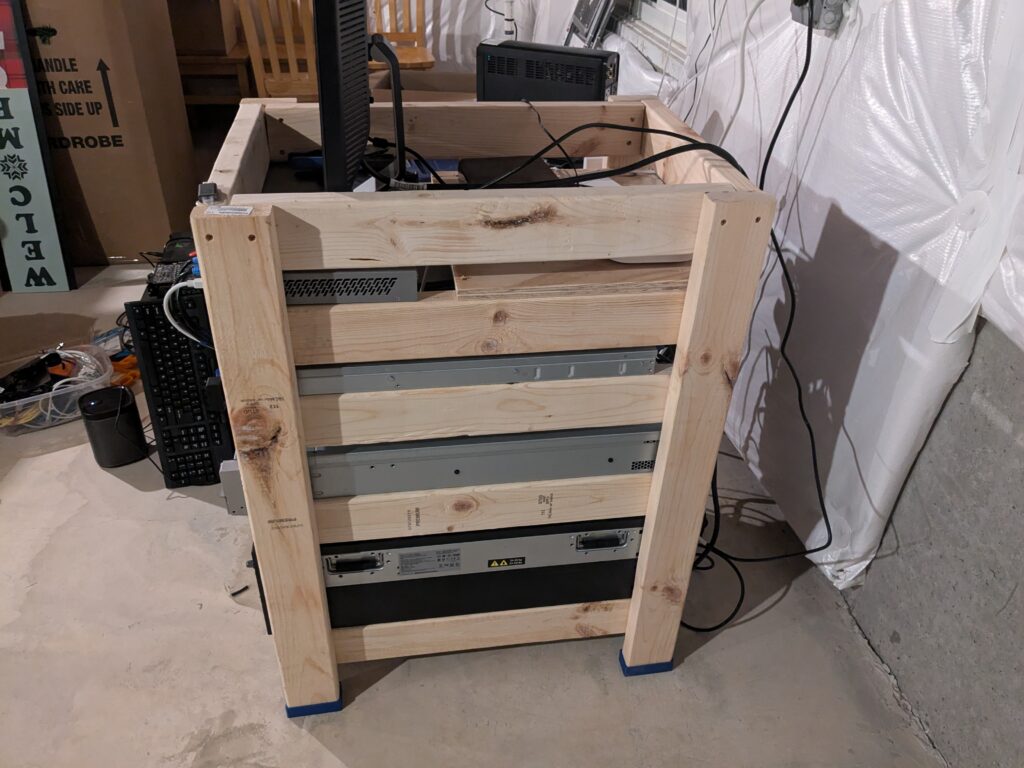
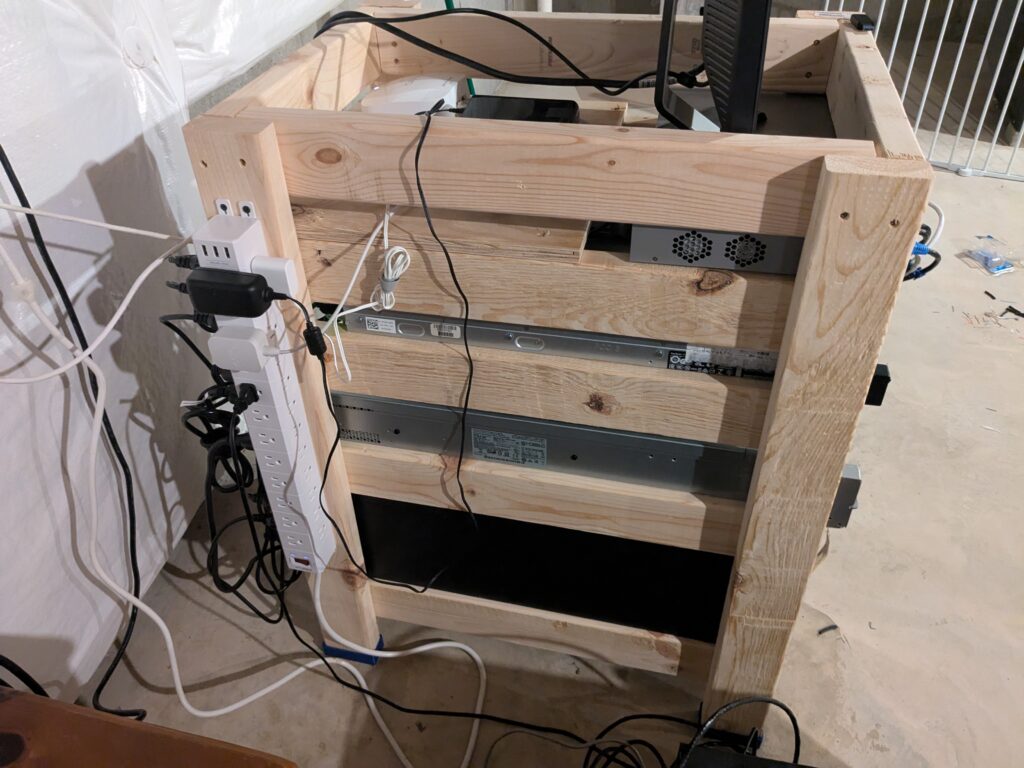
Now comes the fun part! Building the damn thing 😀 Overthinking and over planning really sped this process up. Between my diagram and spreadsheet, it was a cycle of mark, cut, screw, repeat. Starting with the top and bottom of the frame and attaching the two. Then slot by slot adding in the “rails”, slotting in the servers. Largest at the bottom, smallest at the top.
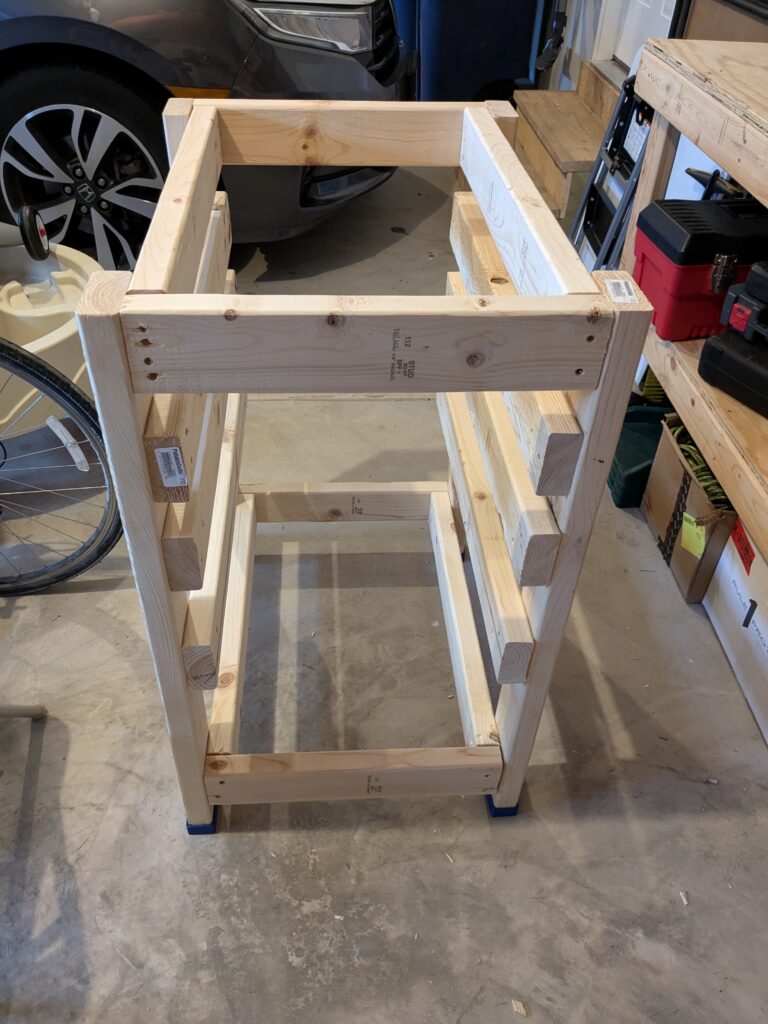
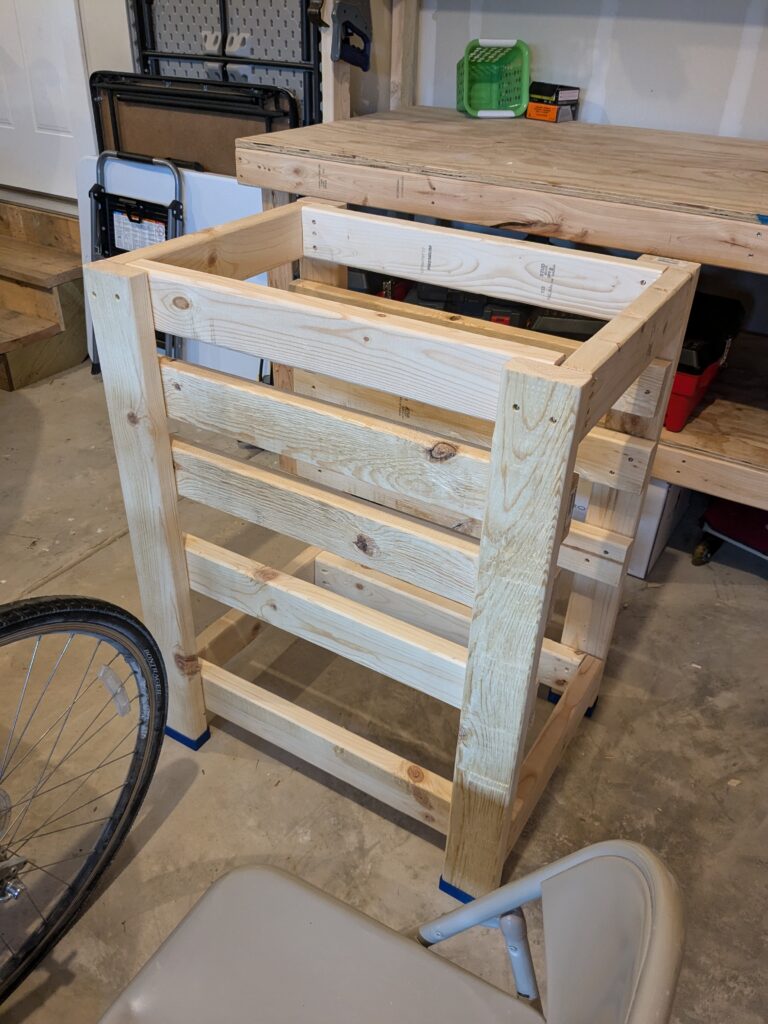
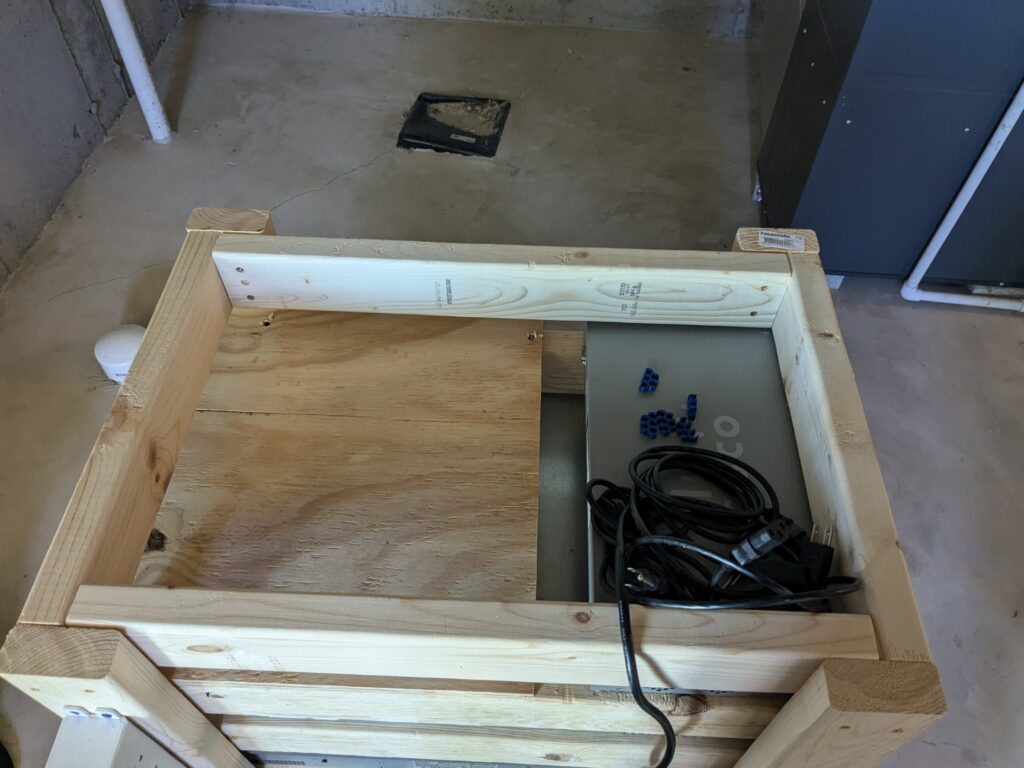
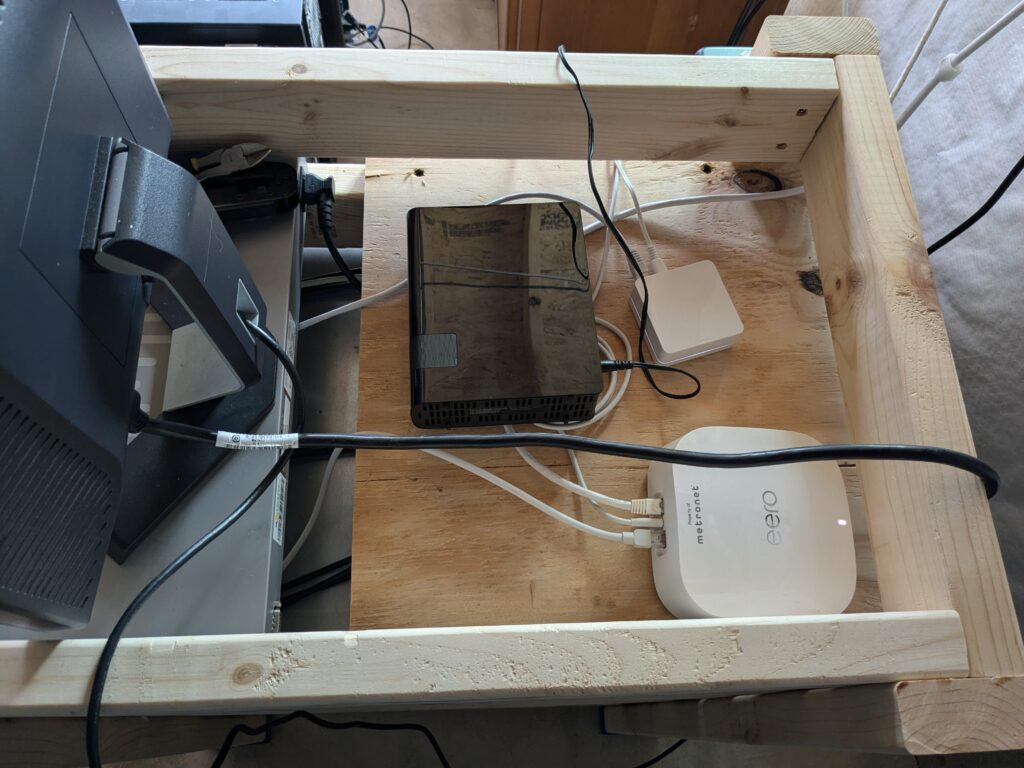
The top of the rack, I used some scrap plywood to make a small platform to hold the small non-rackable equiptment. Router, hubs, external HDDs, etc etc.
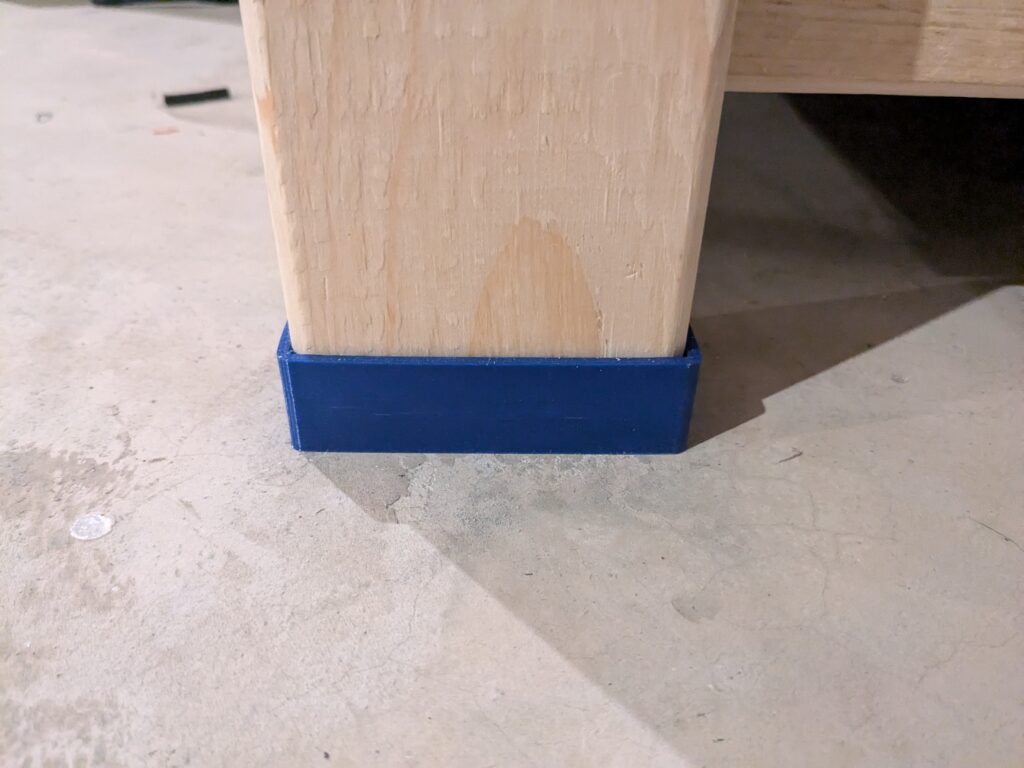
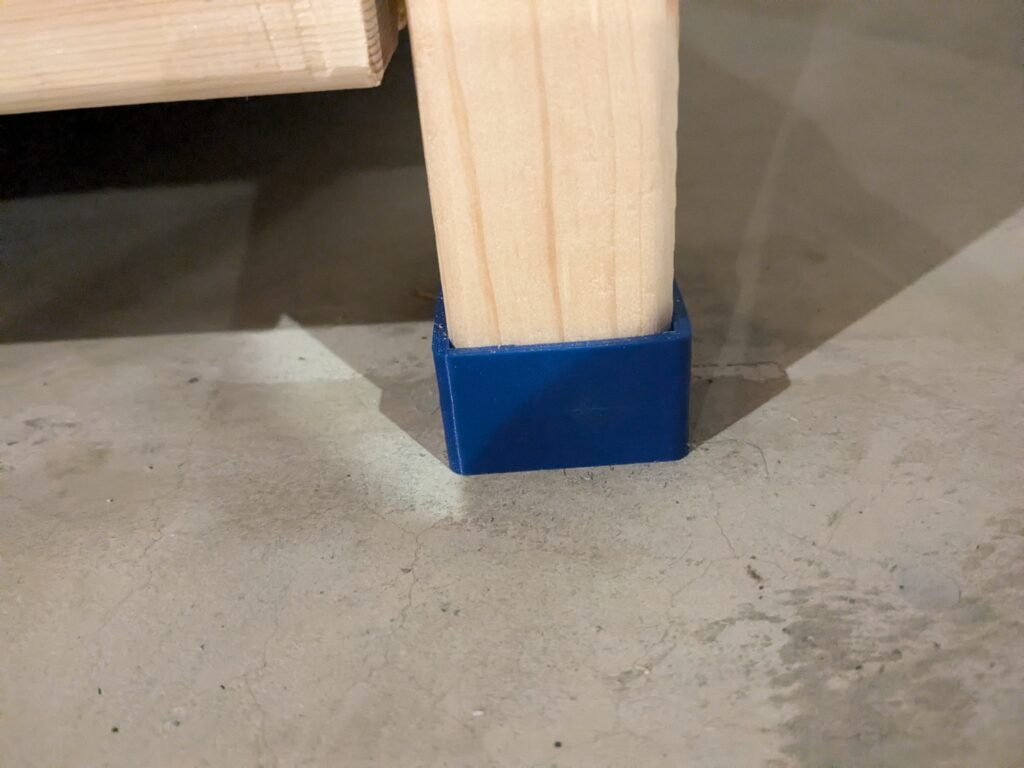
Oh and don’t think that we didn’t 3D print anything for this project! Because I’m a sysadmin and not a carpenter, my rack wasn’t 100% wobble free. Of course on Thingiverse they have a 2×4 foot cap that is specifically designed to fix this problem.
For power, I had a 3D power strip I kept from my old desk before the move. It has so many outlets on it that I don’t have to worry about power bricks eating up several slots. It’s probably a potential fire hazard but hey at least I’m surge protected! 🙂

With power in place and the rack leveled, it was time for the main event, the racking!
Racketeering my Servers
First was my switch, screwed in due to its light weight and shallowness. Next followed the servers, lightest to heaviest, which slid right in. No screwing required, all friction, to keep them in place.

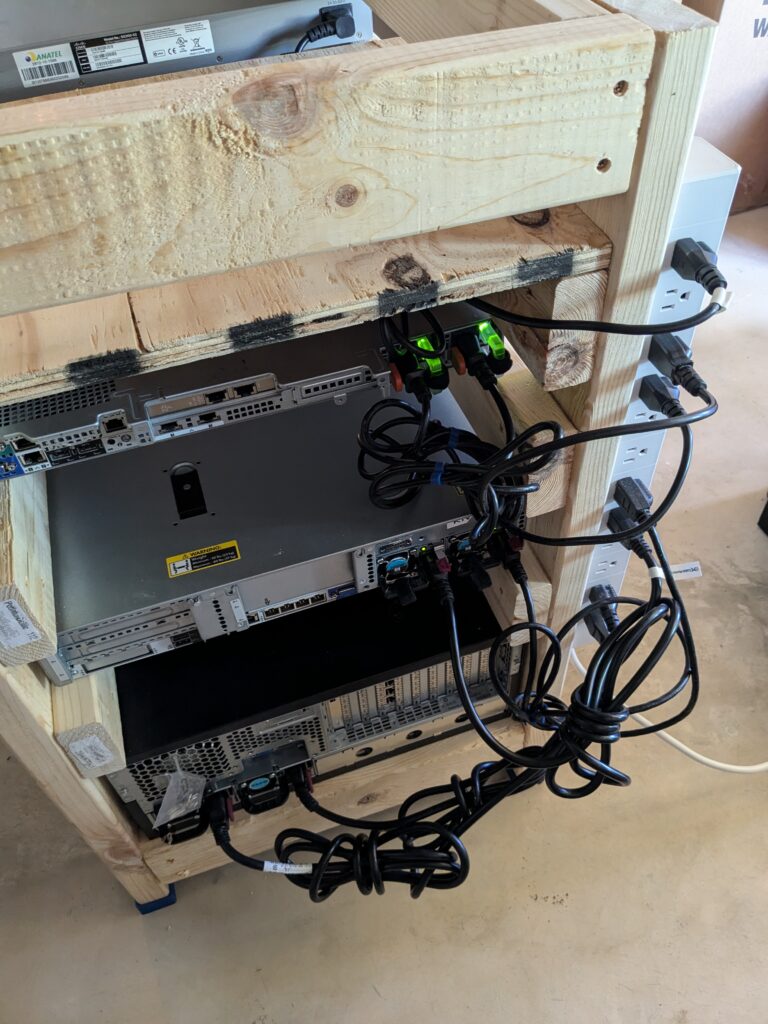
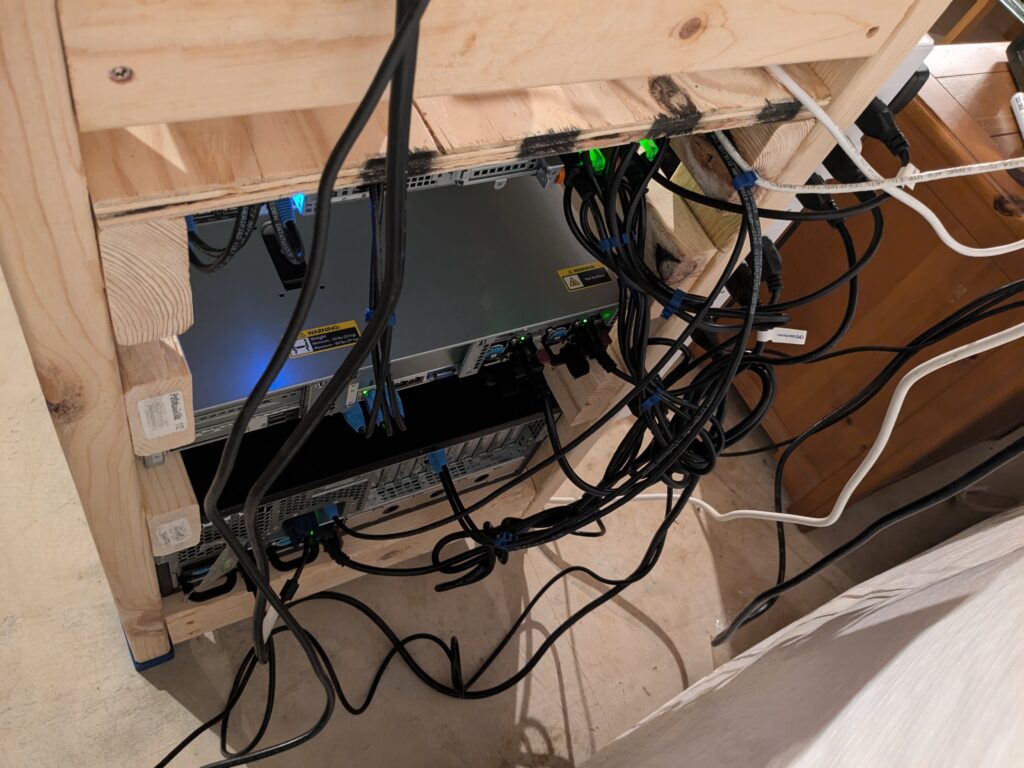
Finally, power and network. To keep things neat and organized I found some cable managers on Thingiverse. Ones for AC cables and ones for Ethernet. Because nobody likes a sloppy run, network or power…
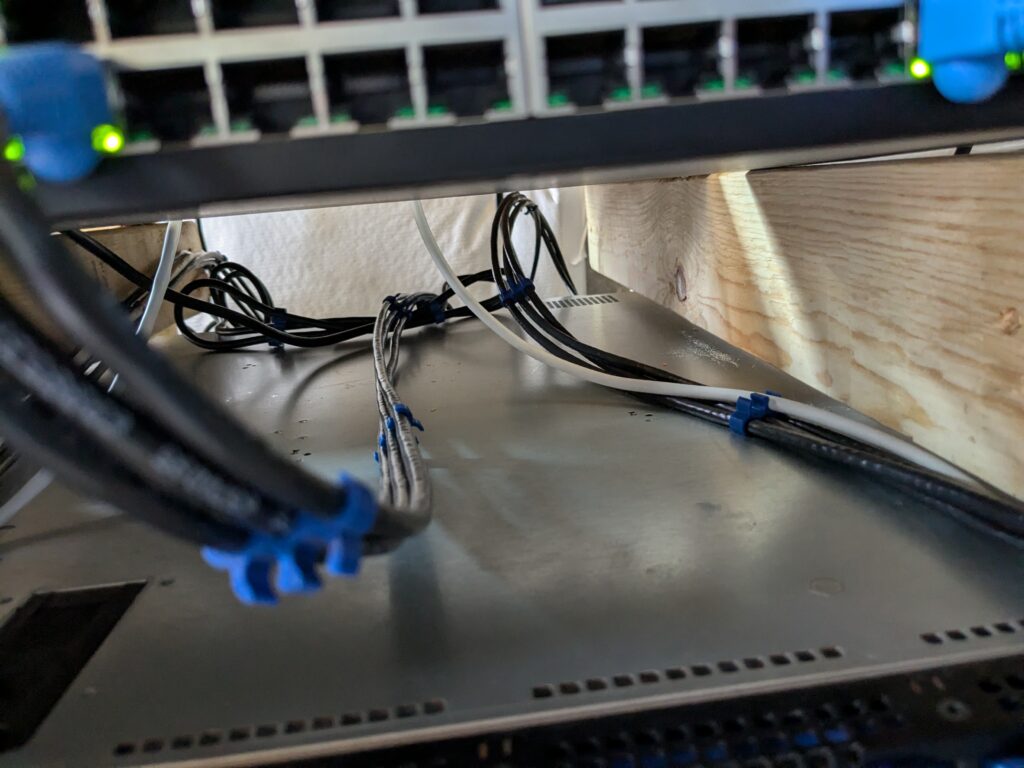
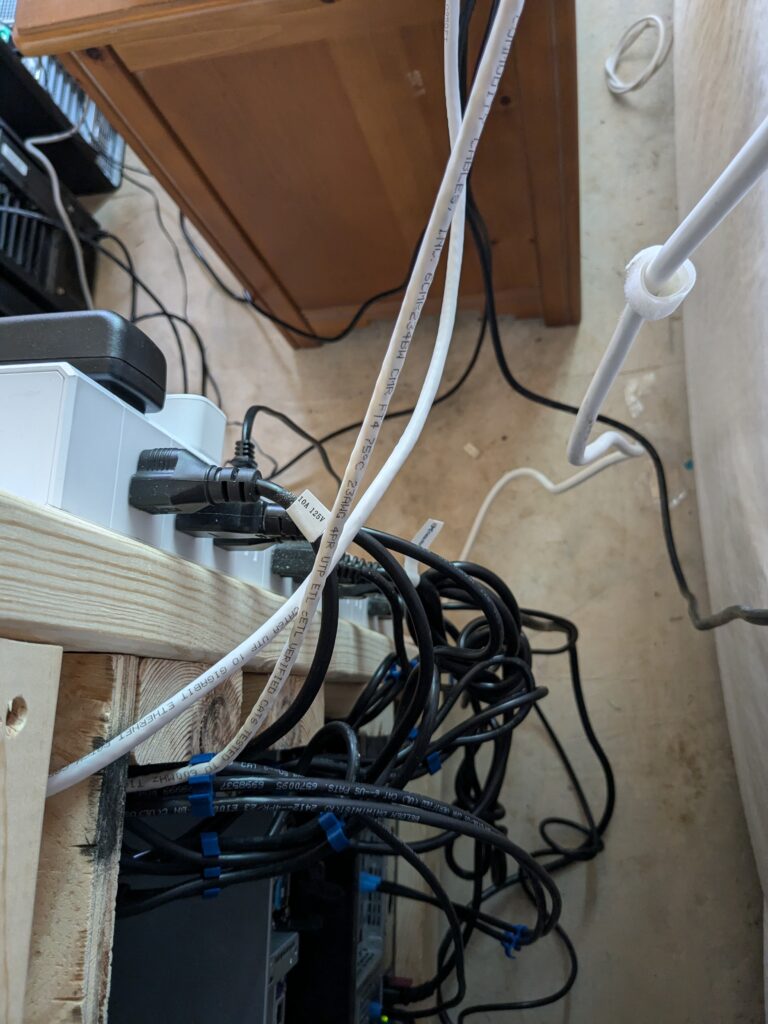
Printing out a least a dozen each I was able to successfully OCD over the cable management of my rack. Aaaaand with everything plugged in, we go LIVE!
Get Racked!
Well friends, there you have it. This is where I leave you, unsatisfied and hanging onto that cliff for dear life. But no worries, there is still a shit ton of stuff to do. Stay tuned for the next set of posts throughout this server adventure!