E-Mail, the corner stone to communication evolution. Shrinking weeks of travel by snail-mail to the speed of light bouncing from server to server. More importantly, who runs those servers? Are they safe? Who else is seeing my newsletters from Professional Spanker’s daily?! Well, lets all avoid a big scandal and take a page out of Hillary Clinton’s book by running our own private e-mail server!

First, what is a mail server? Its a server with special ports and DNS records that allows messages to flow easily and safely to/from other mail servers. ISP’s sometimes block those ports to keep spam to a minimum. In order for this to work, make sure your ISP allows traffic to the following ports:
- Port 25: SMTP (Required for mail servers to talk to each other)
- Port 993: IMAP (Secure way for mail clients to access mailboxes)
- Port 587: E-mail Submission (Safe way for e-mails to send once servers are talking)
If you need more info, here is a table of what ports are important and what they do. In my case, it was required to have a static IP to enable port forwarding on my router and to have those ports opened. Once you can port forward and do some basic testing (telnet for example) to verify those ports are working, then you should be good to go. Onto the next step that is, to install our Mail Engine!
iRedmail: That’s Spanish for you can’t read my E-Mail

In the open source world, there is an endless ocean of “God this software sucks, I’m just going to make my own”… but once in a while, someone comes along and takes all of those half baked projects and stiches them all together. Someone like the iRedmail team.

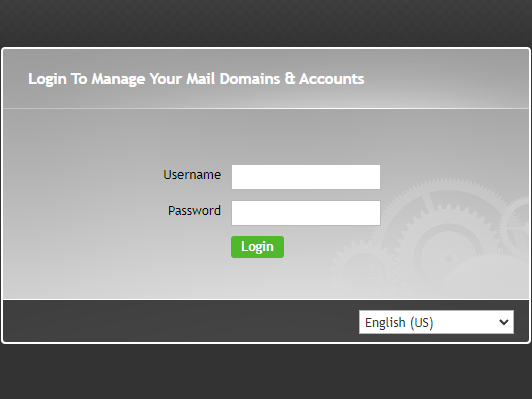
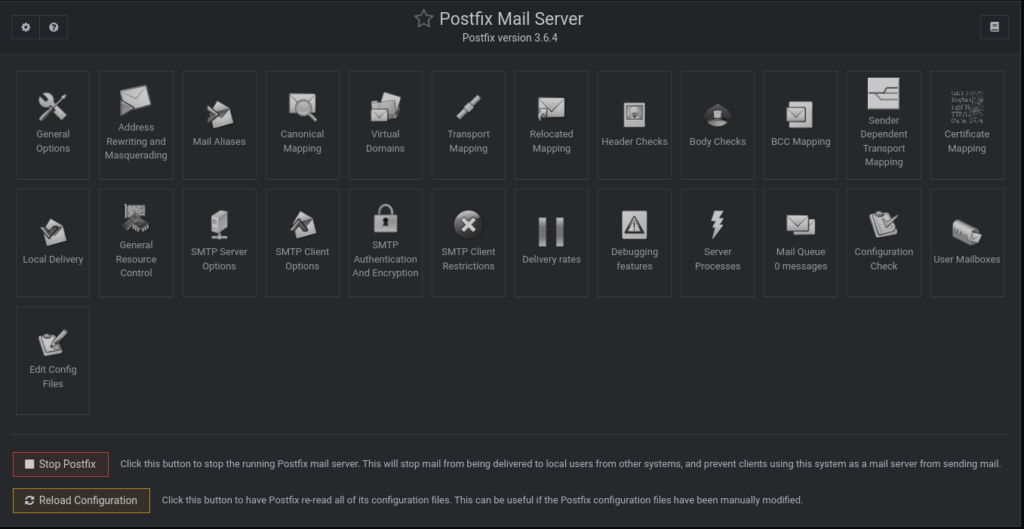
This team of devs stitched together a slew of open source products to make one big comprehensive mail server solution. Postfix, dovecot, clamAV, roundcube, spamassassin, the list goes on! Even the install was painless! Just fire up a fresh VM (in my case Ubuntu server), SSH in, download the install package, and run the installer! In addition, I installed Webmin so I can make all my changes via the browser GUI instead of SSH. After the install is complete, verify you can get to the iRedmail admin page, https://your_server/iredadmin/

If you get there, that means the web server, database and mail engine are running. Next, see if you can get into round cube after you create a mailbox in iRedmail admin. https://your_server/mail/

If you got that far, that is some serious progress and you should pat yourself on the back because this next part is a dooooooooozy 🙂
DNS: Didn’t Name Something
The Domain Naming Service. Like an phonebook listing names and phone numbers, this one lists hostnames and IP addresses. Yes we have ports forwarded to go to our mail server but nobody knows how to find us. Enter the fun world of DNS!

Lets go over a few of the DNS records we need setup. A, MX, PTR, SPF, DKIM and DMARC. Lets break them down:
- A – The A record, tells other mail servers your servers host name and what IP address goes back to it
- MX – The Mail Exchange record, says what IP your mail server is. In this case, its the same IP as the A record but depending on the situation they can differ.
- PTR – Aka a revers DNS record, literally a backwards version of your IP address saying I go to this hostname. Unfortunately, because I don’t manage my own IP address, I can’t do this one unless I move up to a Business class connection.
- SPF – Spam Fishing Fighting method. Basically when other mail servers get an e-mail claiming its from me, they can look at my SPF record and see if it comes from here or tell them to fuck off.
- DKIM – Like SSL for e-mail. On the server, there are several public generated keys that are put into TXT records in DNS. Senders use those keys to sign the e-mail sent to me. My server then verifies that there was no fuckery in transit.
- DMARC – A set of rules on what a receiving server is supposed to do when they get an e-mail from “me”. Spammers can pose as your mail server, but DMARC says, “hey, if it doesn’t pass SPF or DKIM, just toss it”
While this might be mega confusing, the iRedmail team made a super easy guide to follow!
Your First E-mail: Experiencing True Freedom!

You feel that? That sweet delicious taste of pure liberty. Going into your old Gmail, typing Subject: ASDF with a body full of qwer, hitting send, and getting a little ding in your brand new mailbox! That’s the feeling of treas— I mean freedom! I can finally break the chains of bondage from yahoo, google, and Xfinity. No more spying on my newsletters and seeing ads for rubber spanking paddles as they sell off my data. I can now embrace the full peace of privacy. But, we’re not done just yet! If we’re replacing Gmail here, I want to have the full functionality of Gmail. I want to be able to access my e-mail from anywhere.
Forwarding Access with Reverse Proxy
Reverse Proxy, like a regular proxy but backwards! It takes a public facing web server and allows me to interact with the private mail server behind it. I draw a picture for you to make things easier to understand.

So here, when Chrome connects to round cube, its using my web servers SSL Cert to encrypt the connection. Once it reaches my web sever, my traffic says “Yo, i’m looking for round cube.” My web server winks and nods and opens a secret trap door that leads right to my mail server. Make sense?

Now public external connections, SSL is a must. I want zero change of any man-in-the-middle seeing my private traffic. However, internal traffic, behind a firewall things are a bit more laissez-faire. In order to get the internal hand off to work (definitely not because i’m lazy…), I had to enable HTTP traffic for NGINX on my mail server. So now the traffic goes from HTTPS to my public facing web server, then HTTP from the web server to the mail server.

Now that we can get to our mail securely from anywhere, how do we then send e-mails securely!
Securely Sending Messages with SSL
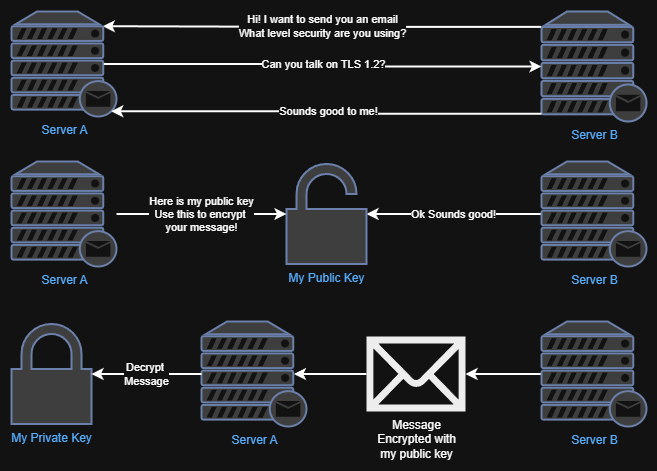
Mail servers, similar to web servers, they initiate communication in plain text (port 25), then they will negotiate via STARTTLS (port 587). Once they agree on a TLS version and start the handshake, the rest of the message and communication is encrypted. The magic behind this is having a public and private key. Picture time!

Mail server A sends Mail server B its public key after they agree on a TLS level and cipher. Mail server B uses Mail server A’s public key to encrypt the message it wants to send. The it sends it back encrypted. Mail server A uses its private key to decrypt the message, where you can read it in round cube. The trick here is the Certificate Authority or CA. This is the entity that issues the certs, like Lets-Encrypt. Everyone knows them, everyone trusts them. Singing my own CA and issuing my own certs, ain’t nobody gonna trust me.

Being that my web-server already has an issued CA and all the traffic is coming back here anyway. The trick here is just to put them into the right spot on the mail server. Again, iRedmail has amazing documentation that covers this.

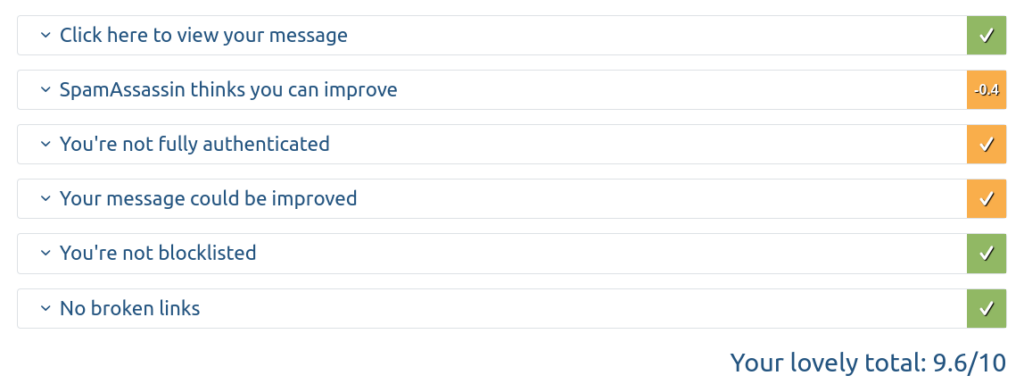
In order for this to work, I just needed to throw together a bash script on my web server to copy over the cert files over to my mail server once a month (lets encrypt renews every 2 months). Well, that’s it! We have gmail-like access, we have secure messaging, we are not showing up as spam according to mail-tester.com.

However, there is always one last hurdle before achieving perfection.
Grey Listing: For those Super Indecisive E-mail Filters
I’m not going to lie, this one threw me a curve ball. iRedmail comes with a slew of prefab security tools and modules. Lots of them on and active because lets be honest, I’d be too dumb to get them running right. However, not fully understanding all of the modules bit me in the ass here.

Here is the situation, I’m changing over my steam notifications to my new e-mail. To get this done, I needed to verify my account, you know the here is your code message. Well, I never got that… I figured hey, maybe I’m blocking them, maybe I set something up wrong. My Gmail account was able to send to my mail server and some of my other accounts verification codes worked. At this point I was at a loss, until a few hours later I got the verification.

Maybe things are just slow? I tried a few more times to make sure. Sure enough, 4 hours later those e-mails came through. Scraping through the mail logs I spotted the culprit, Grey listing. Its right in between a black list and a white list. The mail server will hold onto the untrusted e-mail until the sending server tries again. Why the bother? Mostly because spam servers are very impatient and don’t want to waste time and energy on you. If its not a sure thing, they just move on. Because I’m not paying for the Pro version of iRedmail, its not super easy to tweak the greylisting options, so I ended up disabling the module all together. Again, super easy to do via Webmin inside the Postfix module.

Taking my G-Mail account behind the shed

At this point, I have a working mail server, sending and receiving secure messages, that I can view from a globally accessible web portal. From here, I can start setting up folders for all my newsletters and spam, setup rules to auto file them away, and even start importing my contact list from Gmail. This project was a fun journey for me and I learned a lot. From the deep inter workings of how this basic messaging system that we all take for granted, to the various forms of security and verification that goes into emailing. The founders of the internet really did set us up for success. Well, if you’ve made it this far, thanks for making it all the way to the end of the this rambling! Until next time! 😀
