Well… it happened. Time to bust out the plunger and fix a clogged printer. With me going wild, printing out a stupid amount of toys for Vinny, I may have overdone it… This one is going to be about my experience fixing a filament clog and all the lessons learned along the way. So, strap in, we got some plunging to do!
It Came From the Clog
Filament clogs are common and they happen for a very large number of reasons. Humidity, dryness, too hot, too cold, too stiff, too soft, 3D printing is a picky hobby. Luckily for me, I do all my printing in my basement where a number of those factors are non-existent. Well… maybe it gets too cold in the winter. Anyway, without doing any homework, I decided to throw reason and logic out the window and try to brute force this problem, like a man!

Now I’ve run into clogs before, however, its usually from me switching to different filaments. Going from TPU (230C), to ABS (220C), to PLA (200C), all get molten at different temperatures. So its pretty easy for some TPU to remain in the nozzle the next time you want to print with PLA. Its also easy for that TPU to stay solid and muck up the whole nozzle when that molten PLA tries to squeeze around it. No biggie, just cook the shit out the nozzle at 250C, extrude with the force of Zueus, and get all the crap out. Easy!

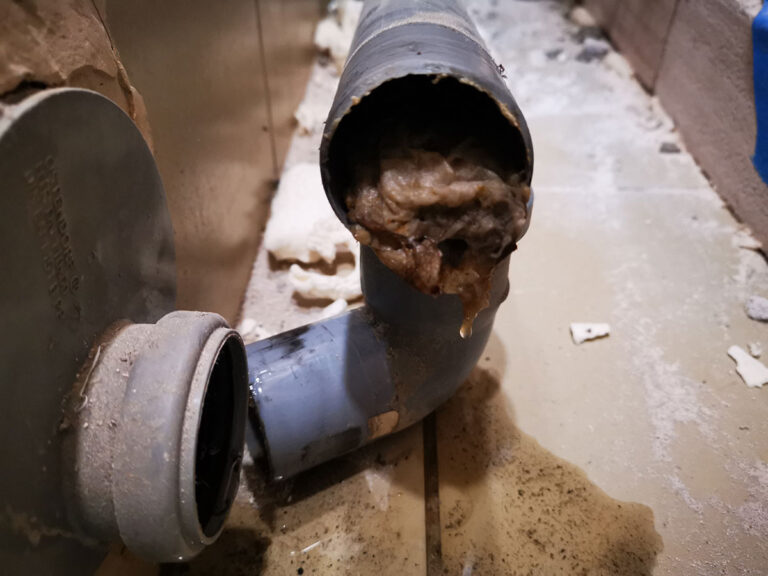
Except this time around, I was doing PLA to PLA. Hell, I didn’t even change spools, I just noticed that my print got shitty half way through the job. No matter, crank up the heat, push and problem solved! Right?! Wrong! Very very wrong… So wrong that in my pushing effort, I had molten PLA coming out around the nozzle from the threads!
Now I officially had a huge mess on my hands, and strong arming it wasn’t exactly working. This required a gentile touch, finesse, and actual research.
How to Actually Fix a Clog
To fix this kind of clog, you have to take apart the whole hot end. Not only that, you have to do the cleaning while its running hot. It’s way easier to remove molten plastic than solid, especially if its one big blob after your printer has made some spaghetti. Don’t take just my word on it, Creality has an official video on how to do this. Just be careful not to burn yourself 🙂
After I hit printing temps, the first thing I do is remove any filament I have feeding into the printer. Then, remove the nozzle and the Bowden tube going into the top of the hot end. Next, take an Alan wrench that came with my printer, the second largest one I think, and ram rod it through the heating block. This would clear out a majority of all the crap that’s in there. As an extra bonus, I’d also run a damp rag through the block to catch any fibers that may have been missed. Just make sure the rag isn’t frayed so it doesn’t leave its own fibers behind. Running through the block a few times, I reversed the process and put everything back together. With the printer still running hot, I fed the filament back in and started a test print.

Were it so Easy…
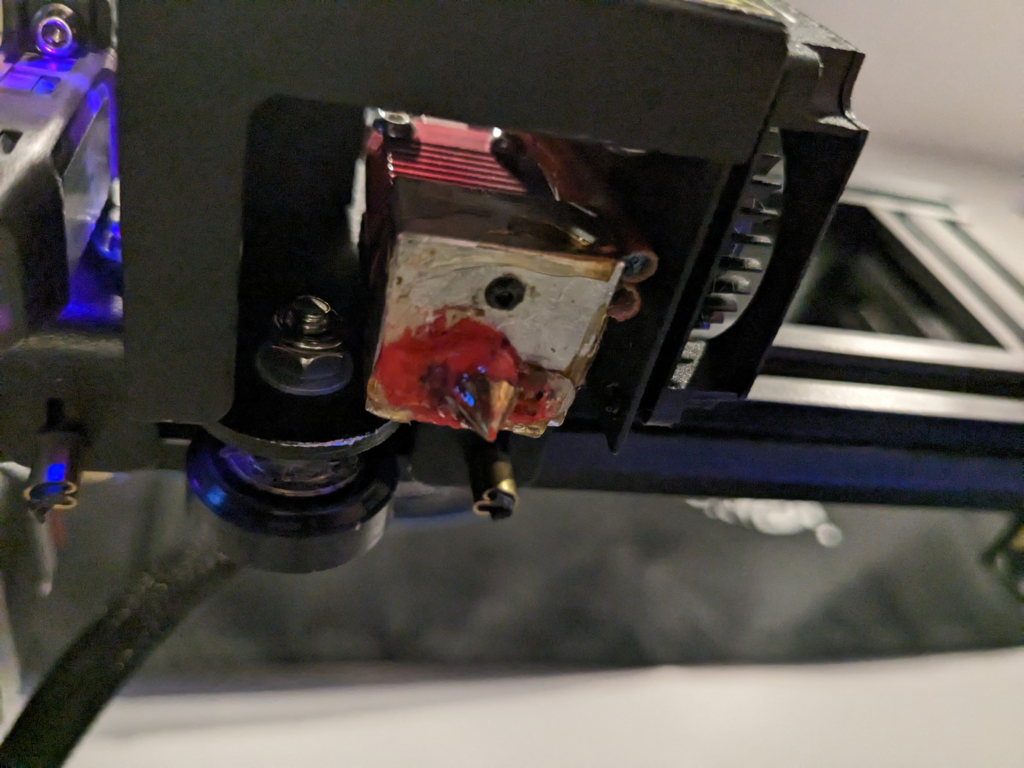
Oh you thought we were done? We’re not out of the woods just yet! Spaghetti and clogging still ensued. So if it’s not residue and gunk causing the problem, then what is it? In doing some more research, I came across a video that explains the most common reasons for clogging, in great detail. In the video they show a cutaway of the heating block, displaying the inner assembly. Here is an example:
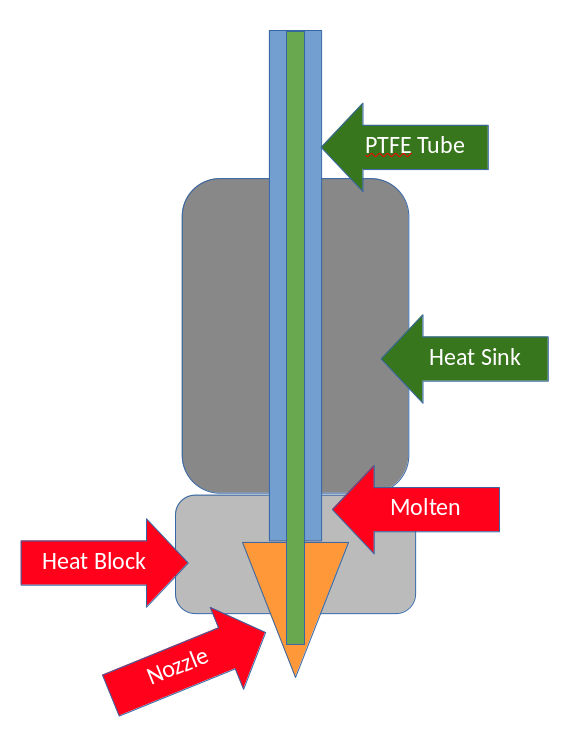
This is the ideal setup. Filament runs through the PTFE tube, through the heating block and right into the nozzle. The PTFE is made out of material that can handle the high temperatures of the block. So the heatsink is there to keep the heat from the block from creeping too high up the tube, aka heat creep. If the heat travels too far up, the filament gets molten too early and then clogs in the tube, hardening where it shouldn’t. This wasn’t my problem however.
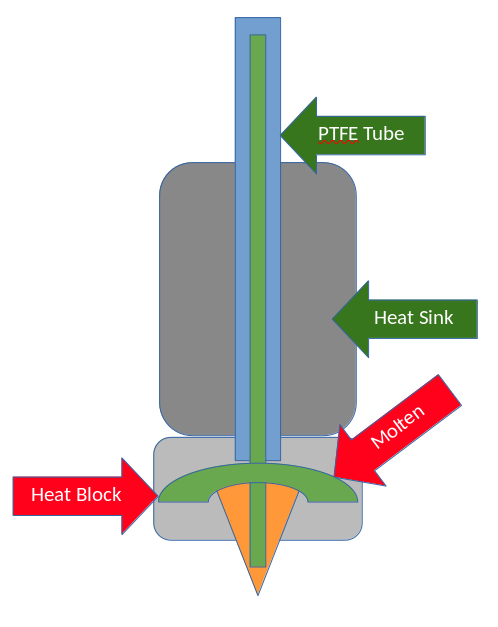
My issue has to do with the tube not making a tight seal against the nozzle. So as the filament makes it way through the heat block, melts and then just oozes out everywhere. While messiness is annoying, its not the main problem. The real problem is pressure, the lack of it. When the extruding motor pushes the filament, its expecting to only push a certain amount. But, if some of that filament isn’t going through the nozzle, that’s what your prints turn brittle and ghost like. Now that I know the issue, it’s time to take action!
Don’t Need a Plunger to Fix this Clog!
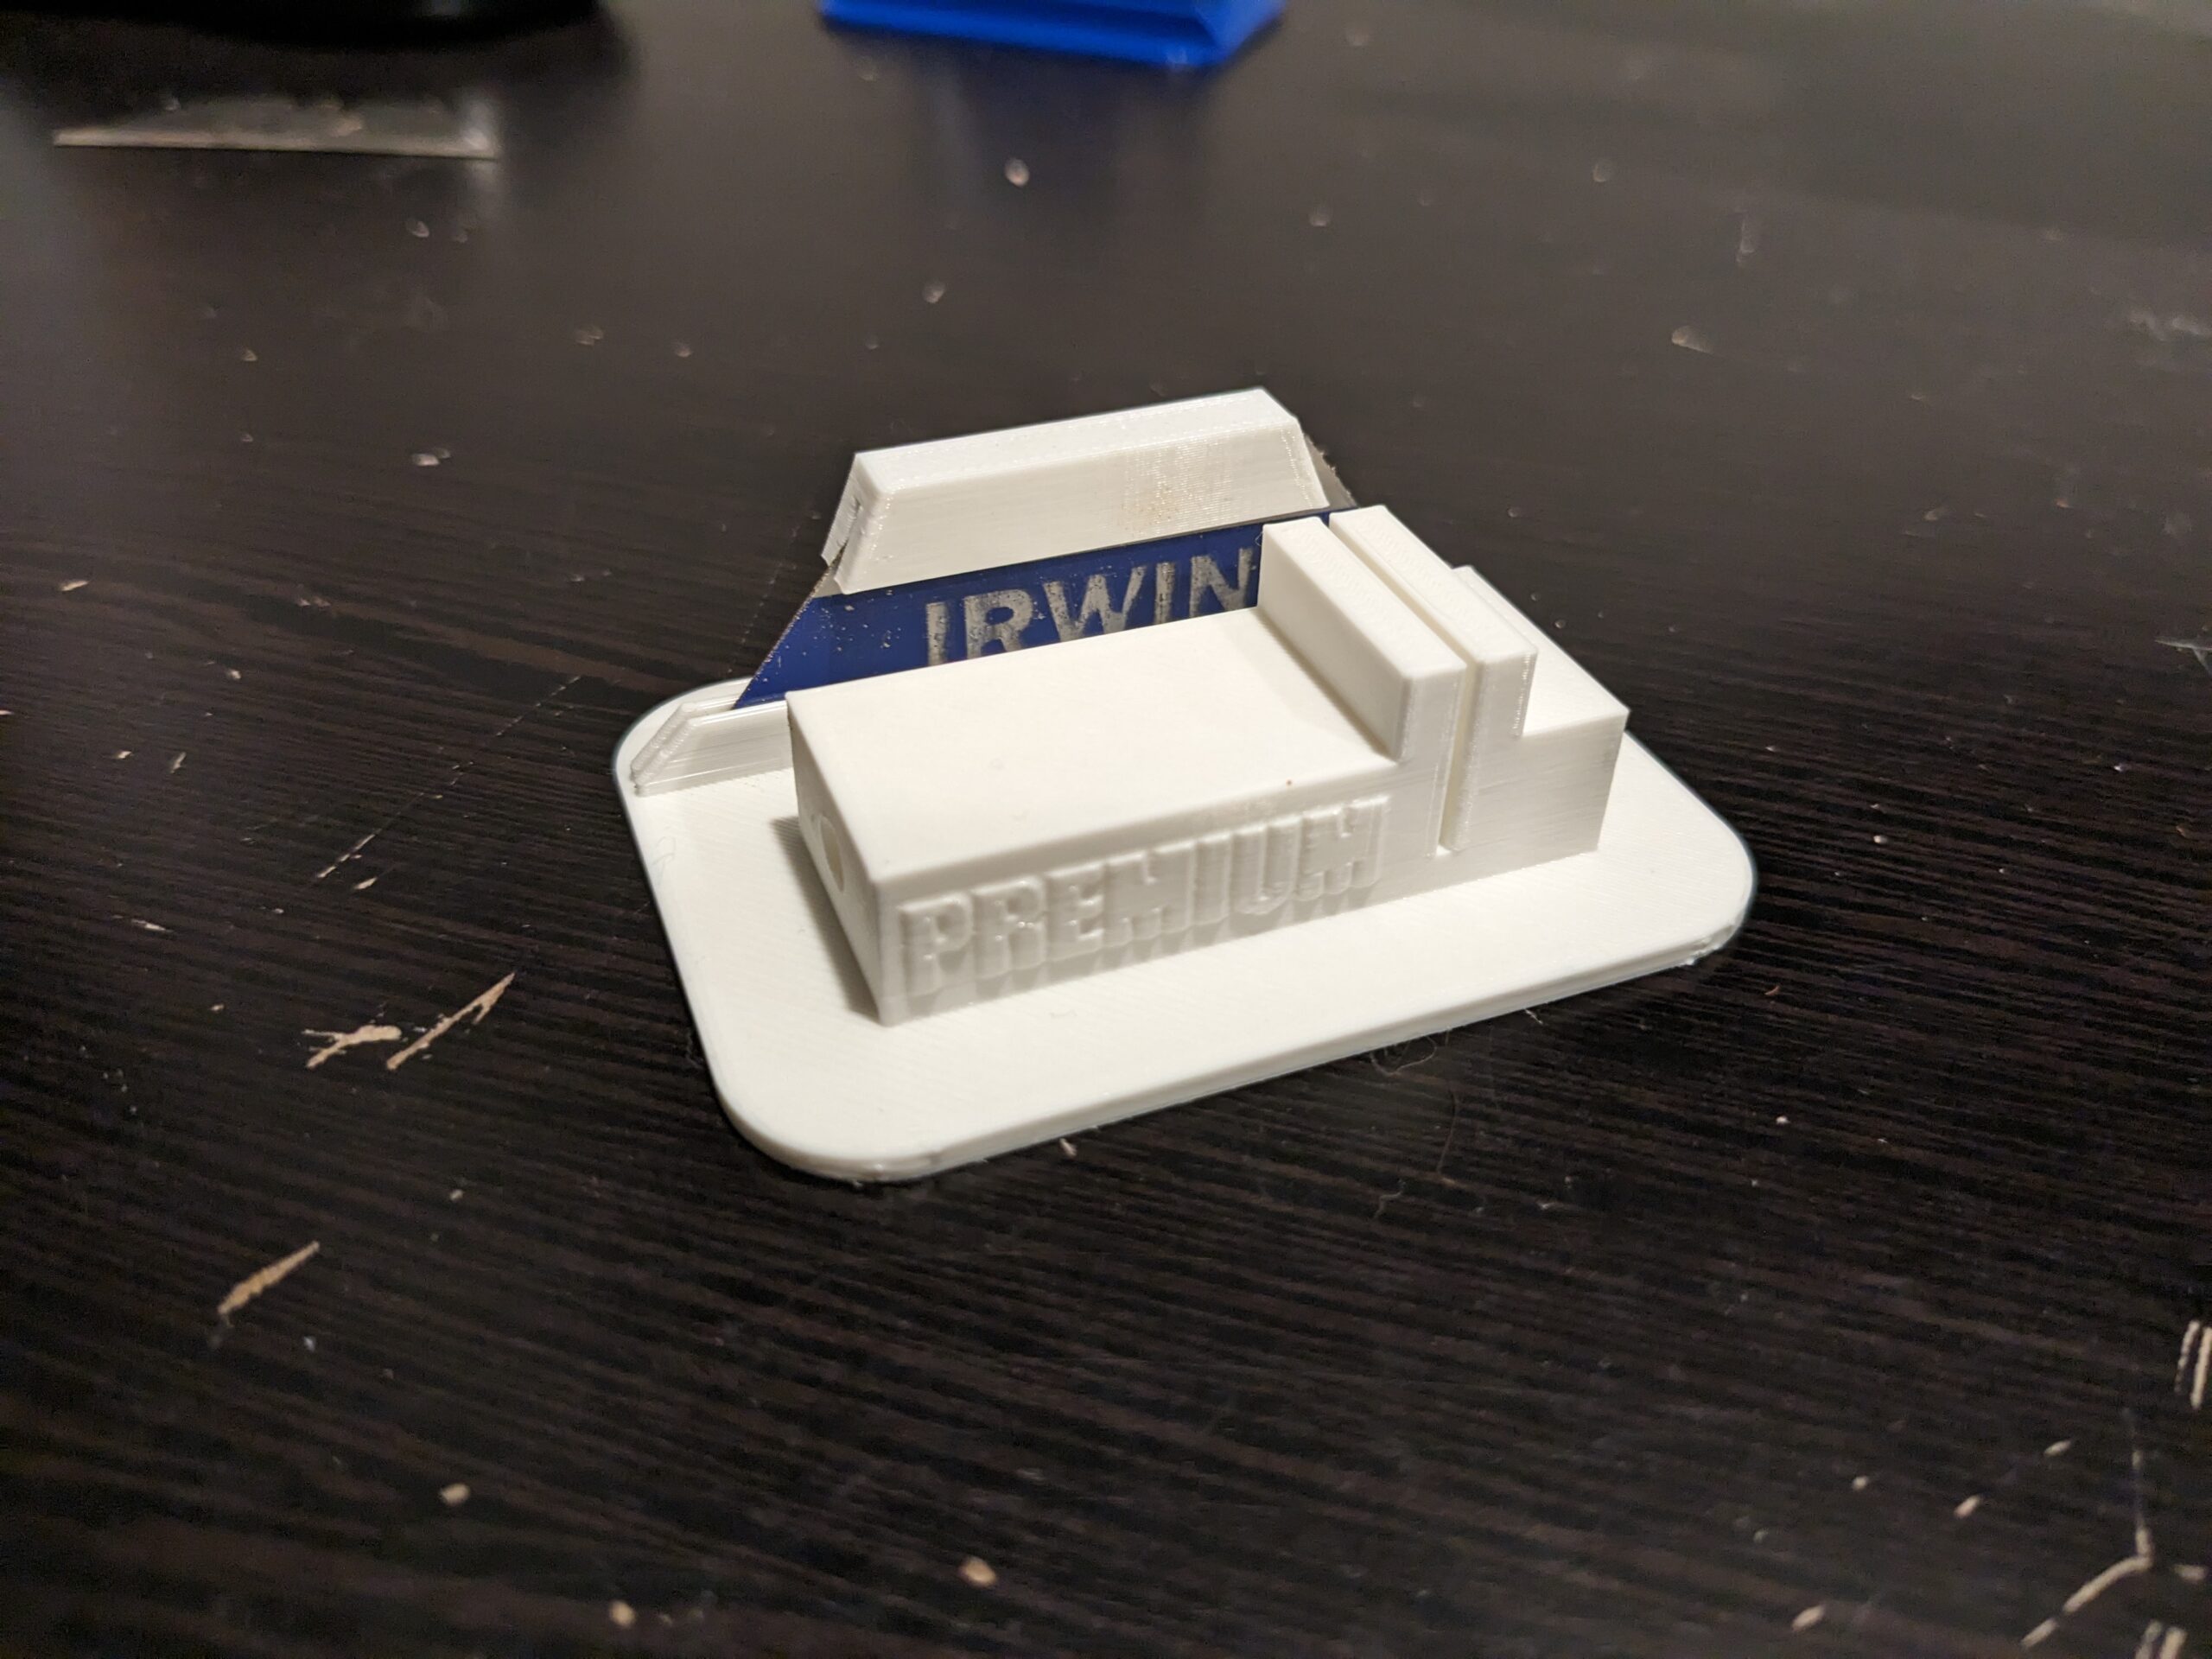
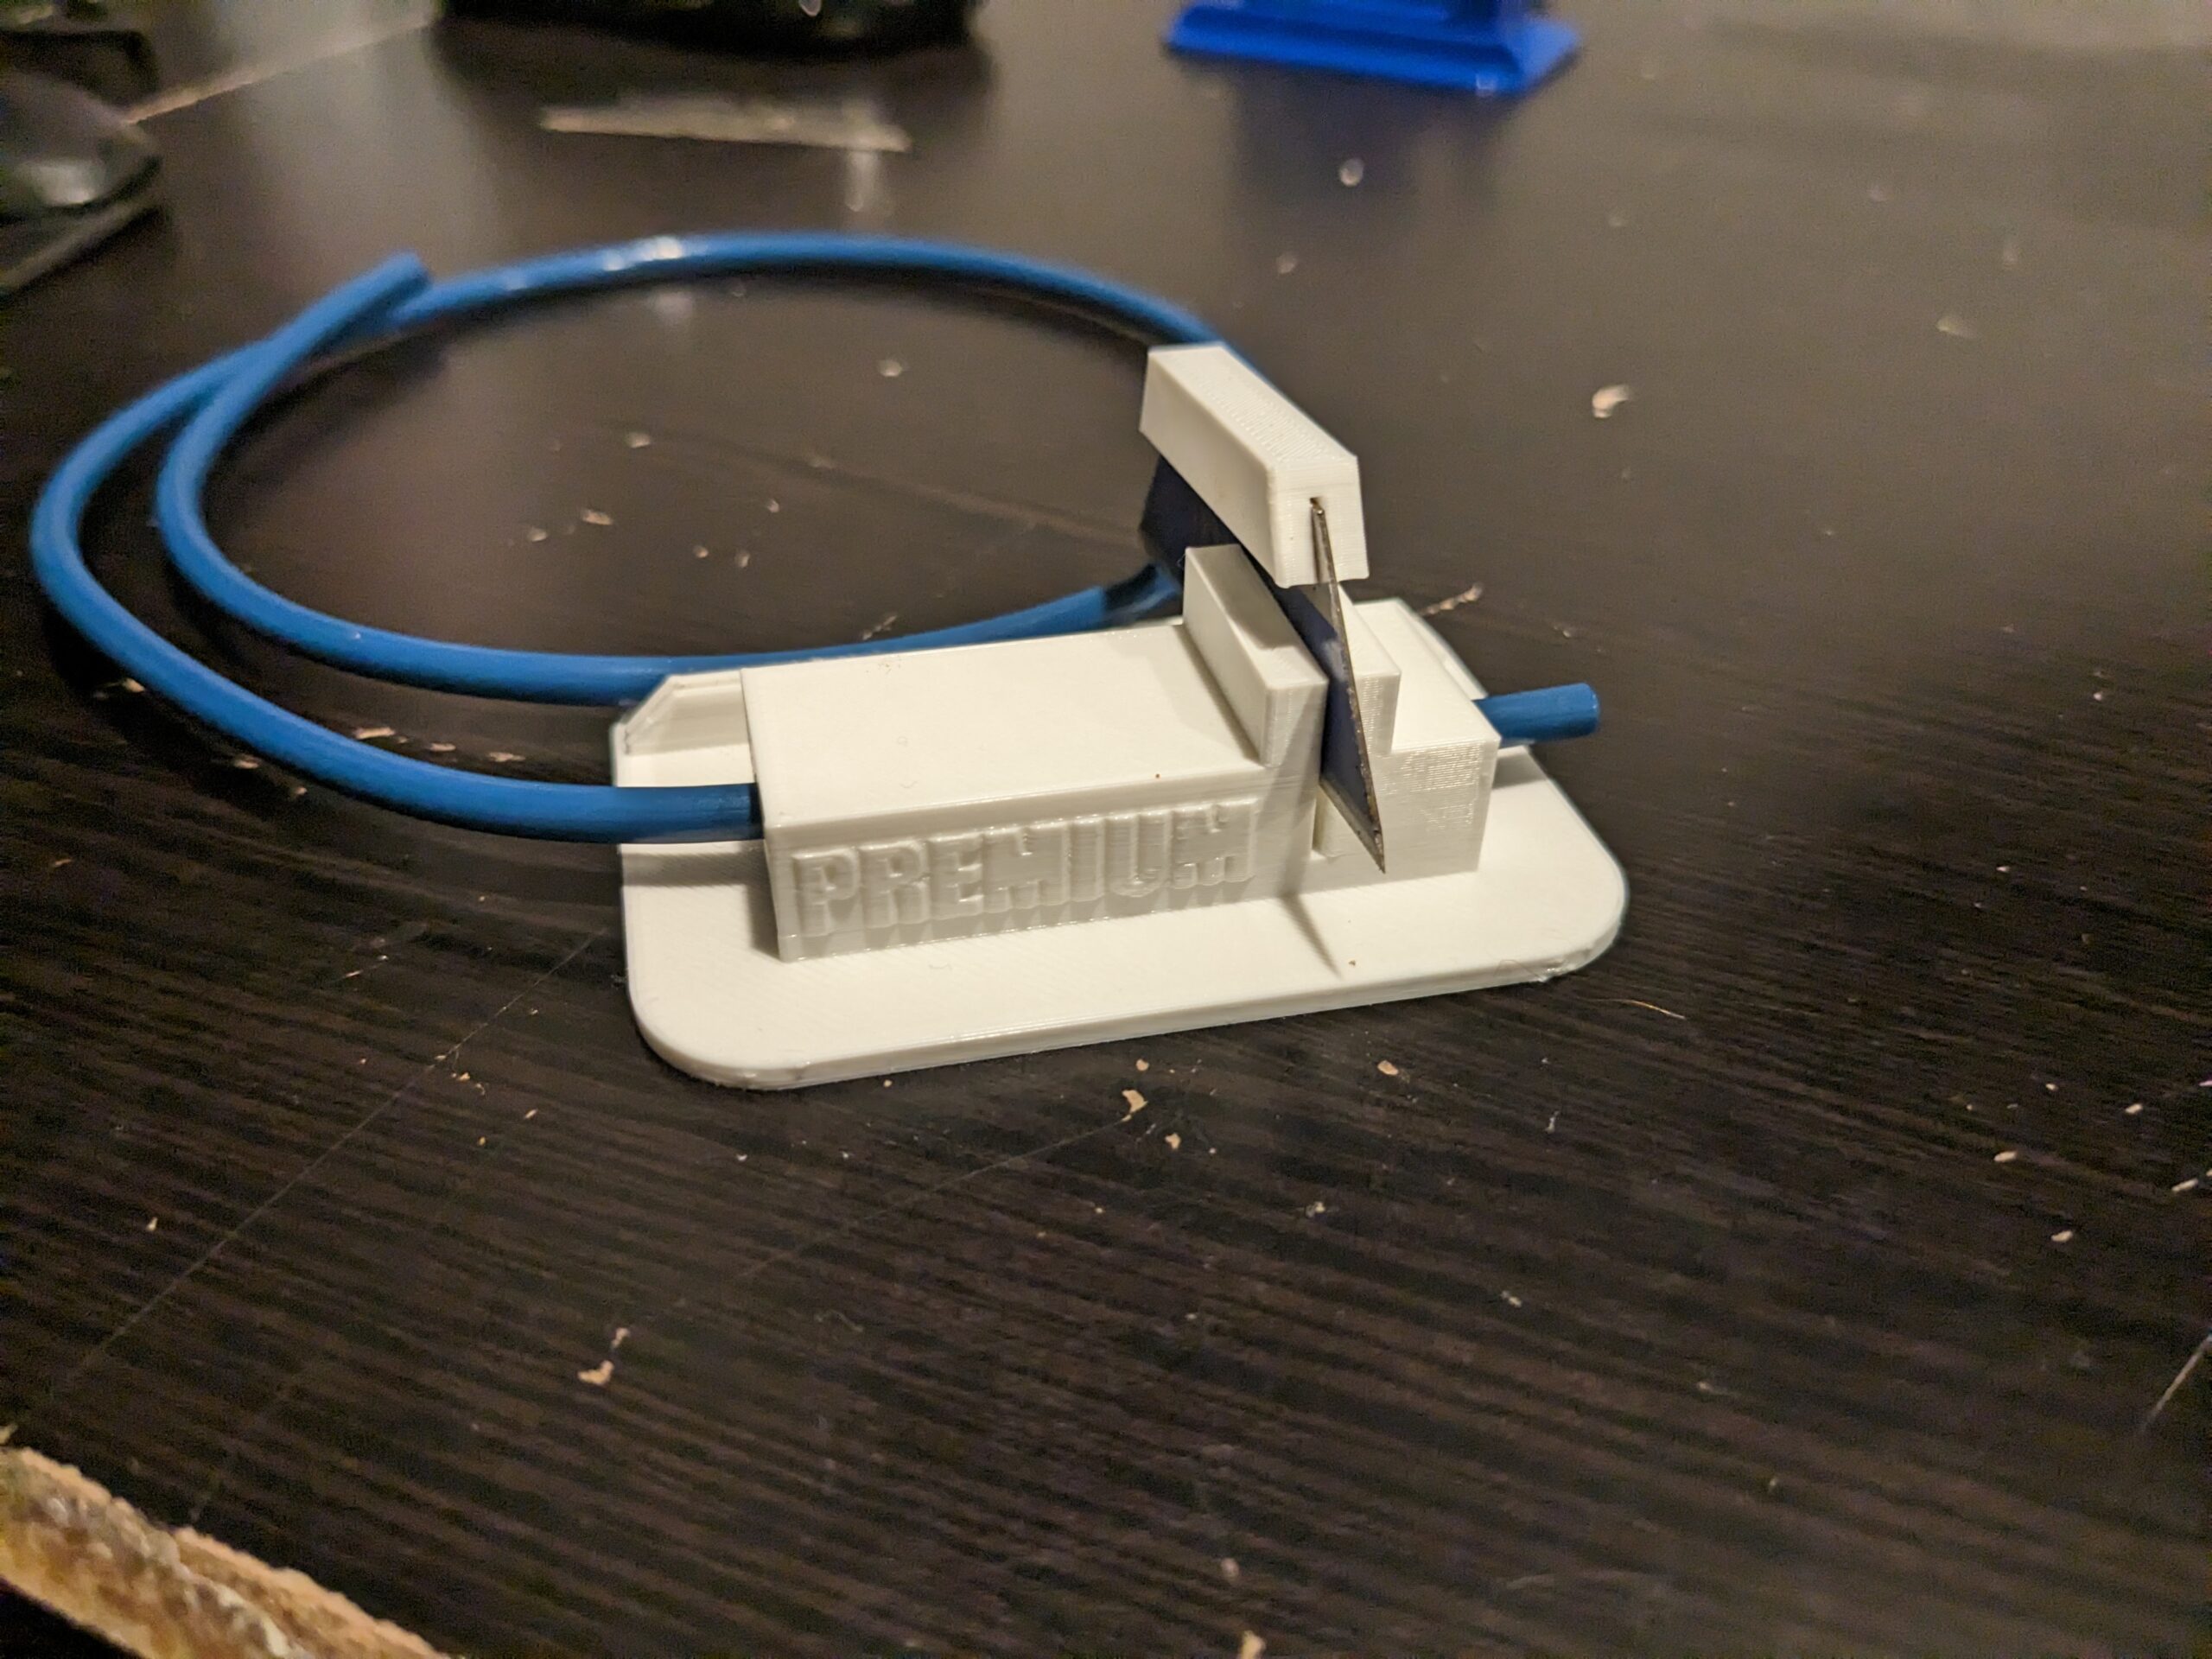
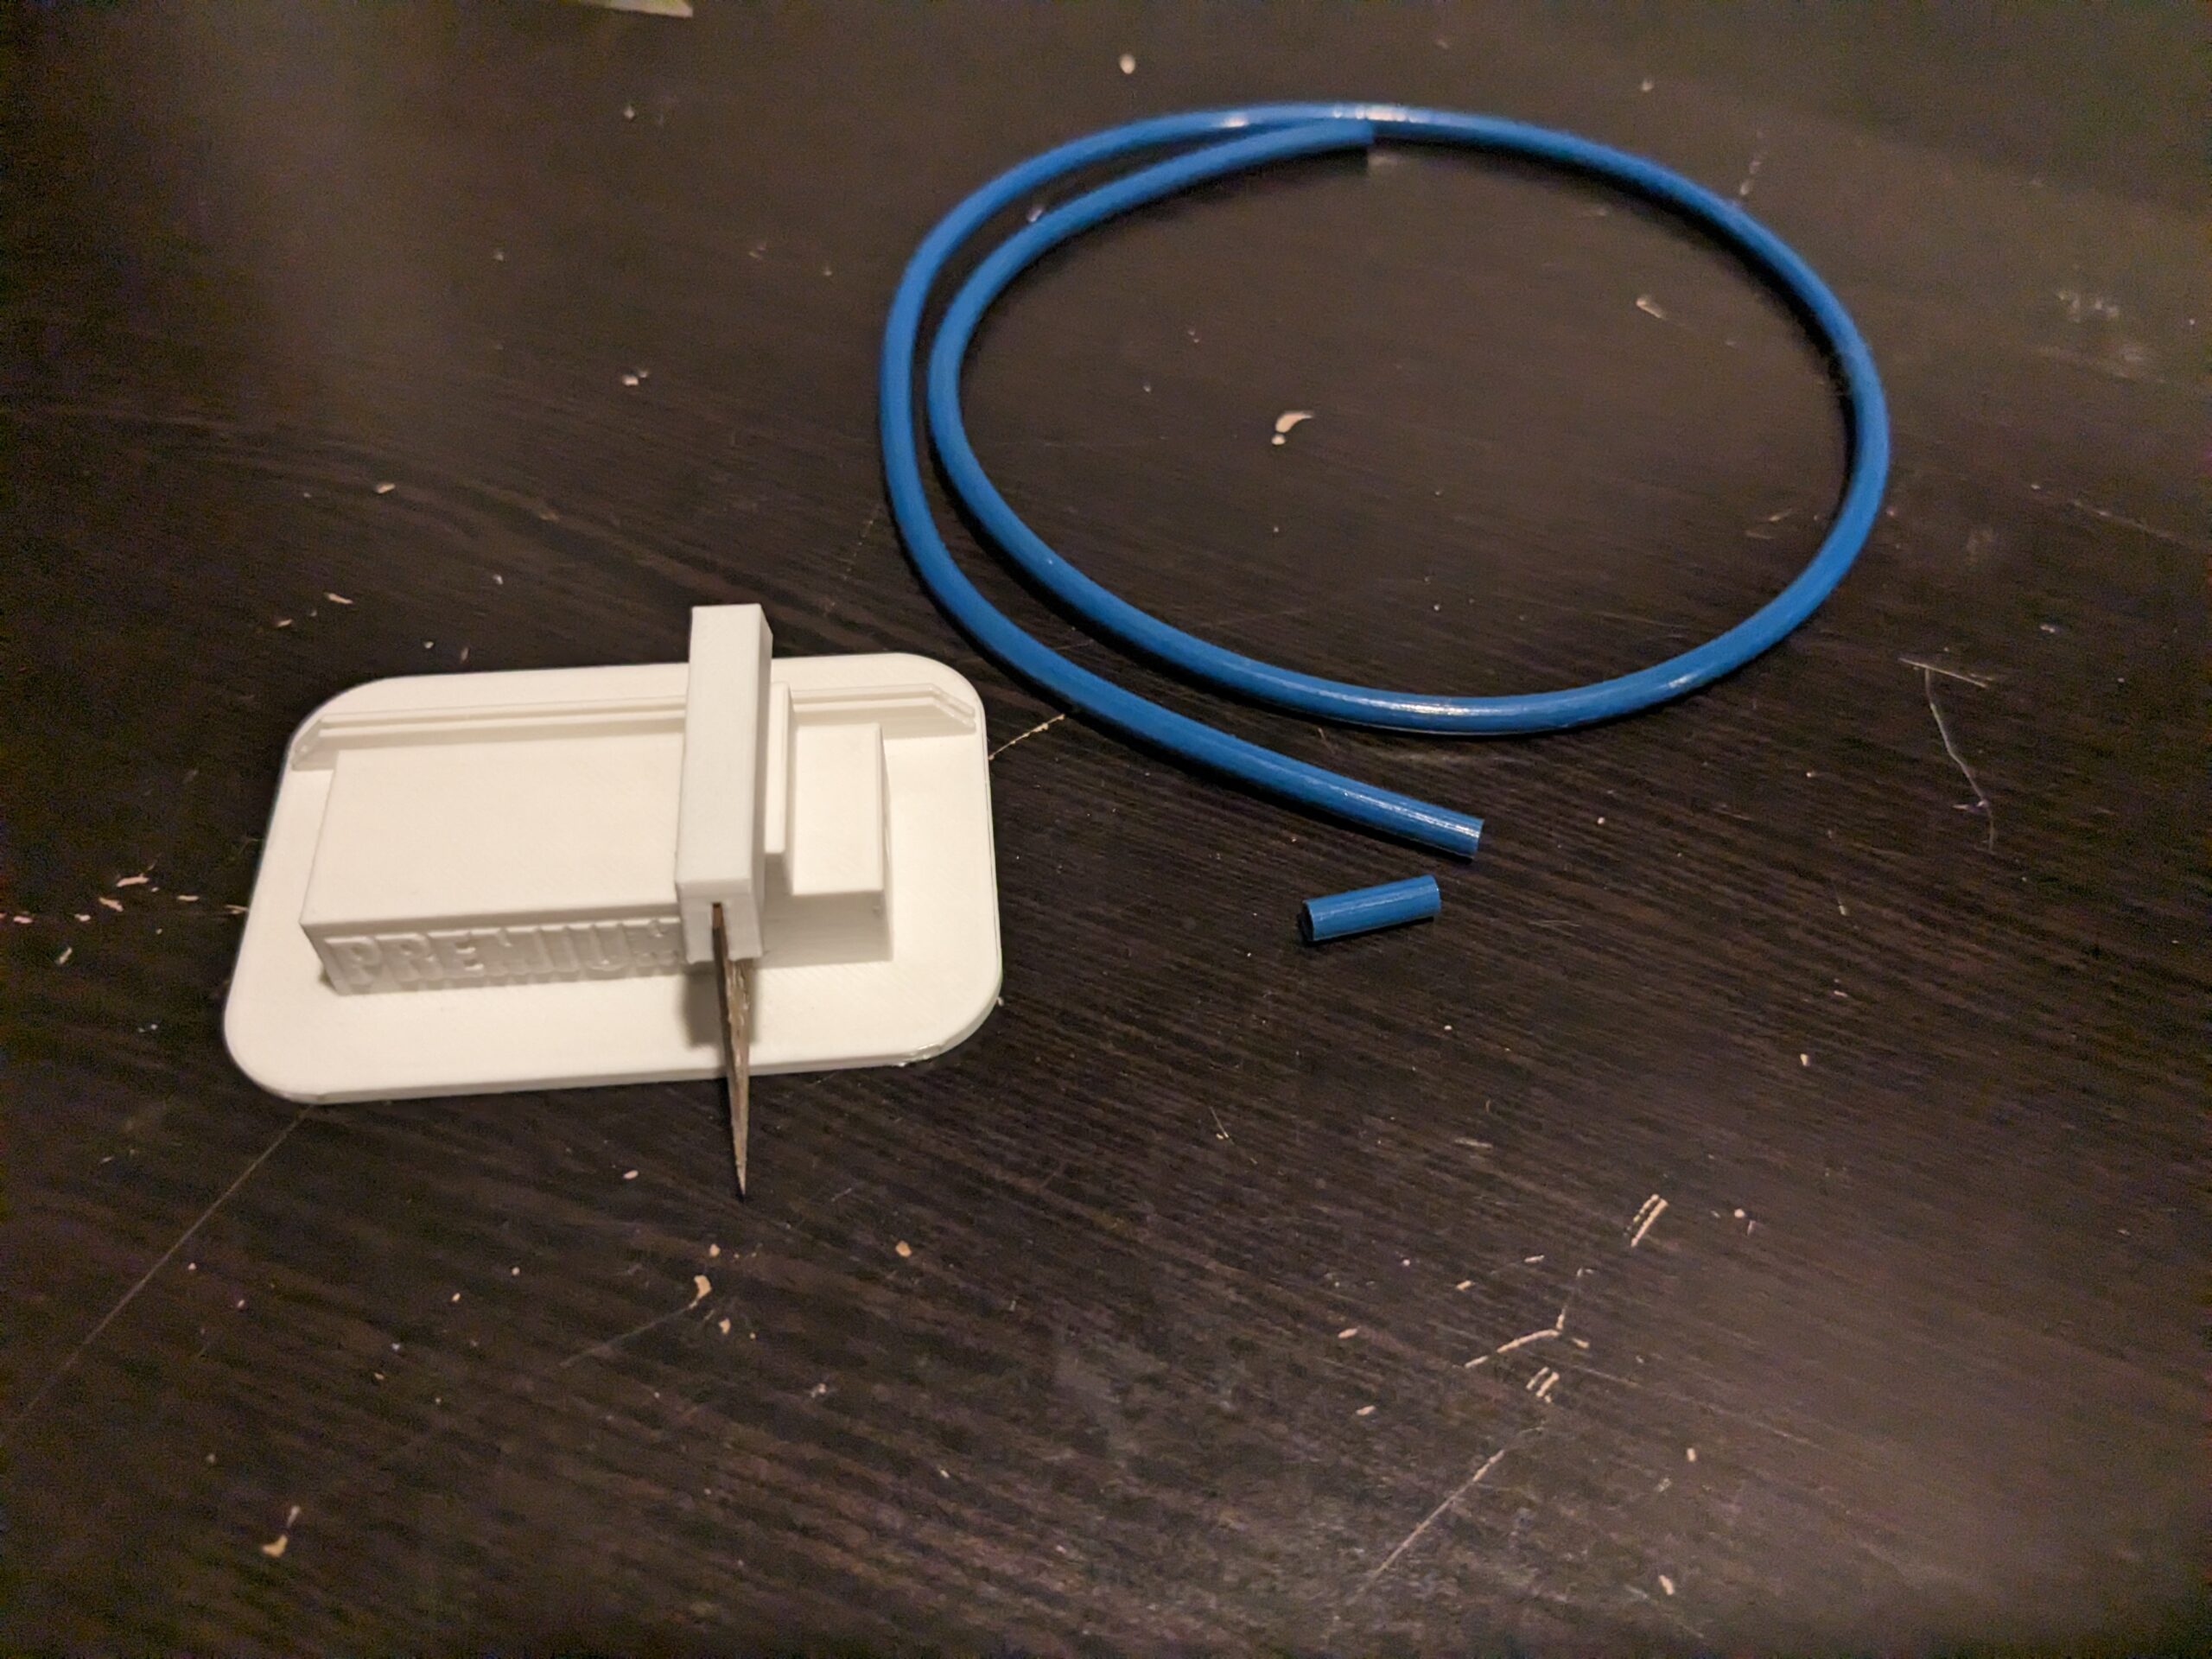
Lets go back to why there isn’t a good seal. Based on the research I’ve done, its is abundantly critical that the tube is cut perfectly flat. If its cut at an angle, over time filament will leak out and cause this issue. So to ensure I did things correctly, I nabbed a PTFE cutting mold off of Thingiverse. Slide the tube into the block and bring down a razor blade like a guillotine.
With the tube cut, it was just a matter of reassembling the hot end, again… However, this time I added a small twist I picked up (no pun intended). On the step where you feed the tube back into the heatsink/block with the nozzle screwed in, don’t screw it all the way in. Leave it a 1/4 turn loose. That way, when the tube is sitting flush against the nozzle, that last bit to tighten really presses the metal against the PTFE. Remember to only do a little bit, too much can cause the tube to collapse and cause fiction against your filament or spring another leak!

Yes yes, we are actually done this time. After assembly, I ran a few test prints and they came out looking great. Crisis averted! For now… Hopefully the PTFE cutting tool helps you on future endeavors, and if you are really working your printer, show it some appreciation with a little maintenance 🙂
Well, that’s all for this one, thanks for stopping by! Keep curious and keep printing!